Let’s get straight to the point. Is LinkedIn Sales Navigator worth it?
The short answer is: Yes. Businesses that are serious about LinkedIn lead generation will go out of their way to buy and use it.
Why? Because LinkedIn Sales Navigator removes any restrictions you would have on a normal LinkedIn account and grants you exclusive LinkedIn features to accelerate your lead generation and grow your business.
If that’s what you’re looking for, then you’ve come to the right place. This post covers:
- The benefits of Sales Navigator
- Which subscription tier is right for you
- How to get started with Sales Navigator for LinkedIn
- Advanced tips for the most effective lead lists
- Expert Sales Navigator hacks — including how to bypass the LinkedIn InMail limit
The benefits of LinkedIn Sales Navigator
If you’re new to LinkedIn, you might be wondering whether to fork out the extra money for a sales navigator account. Isn’t the basic version of LinkedIn enough? After all, you can still see all the same prospects, and you’re able to connect with whoever you like.
If you’re serious about growing your business and sales results, then yes, you really do need a paid account.
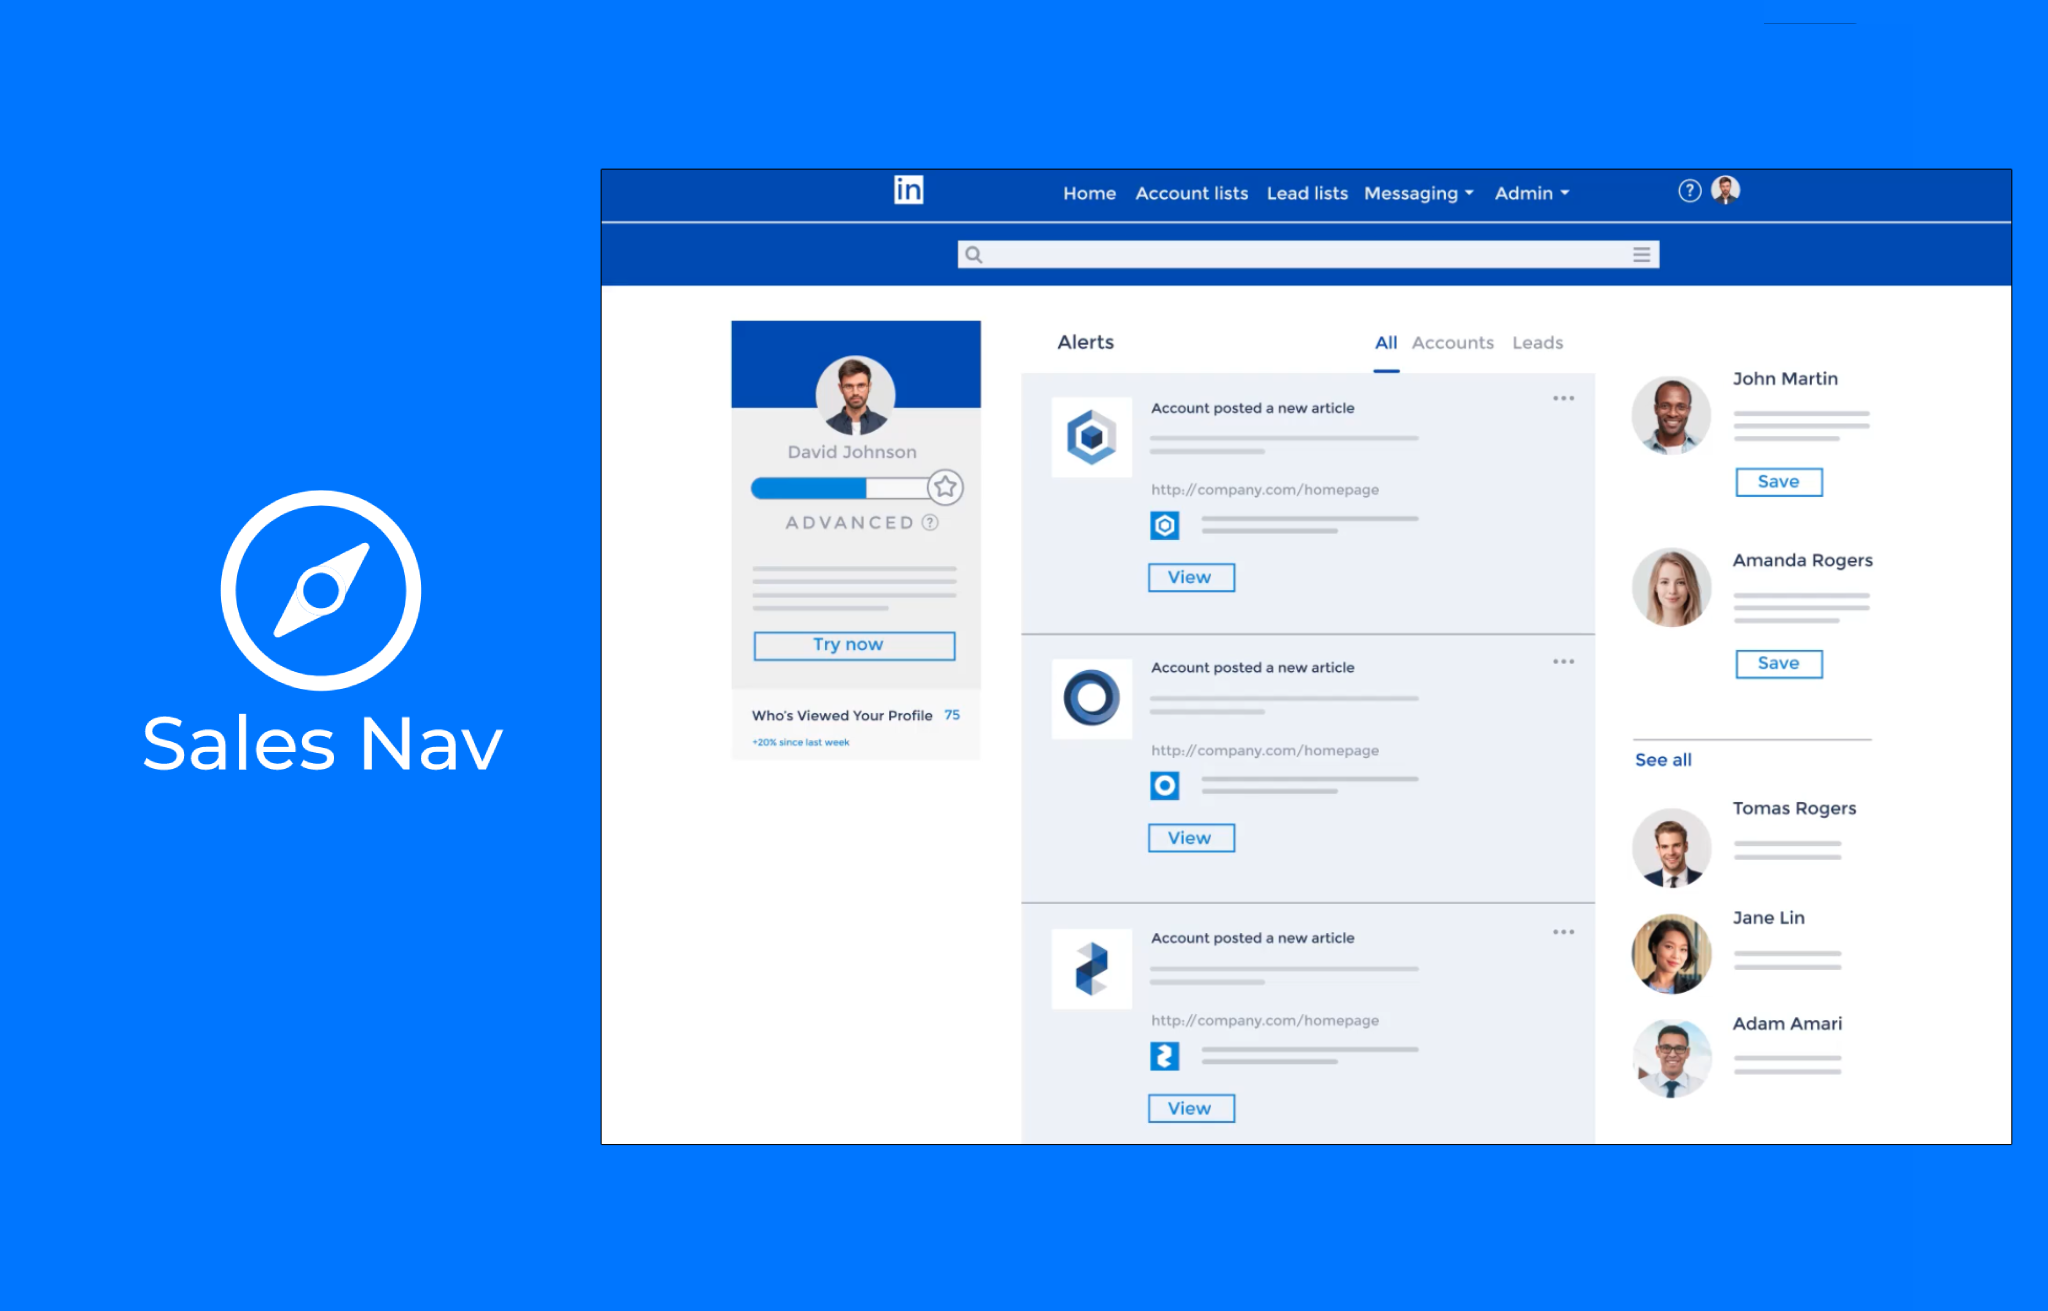
When you buy a LinkedIn sales navigator subscription, you get access to a special dashboard designed specifically for prospecting. You’re able to save lists of leads and accounts, receive updates about relevant activity to tailor your outreach and see extra profile insights not available on the basic LinkedIn tier.
Plus, there’s another lovely carrot: LinkedIn InMail allowances (up to 50 per account) let you send longer outreach messages to prospects, even if you’re not connected on the platform.
LinkedIn Premium vs. LinkedIn Sales Navigator
Realized it’s time to upgrade your LinkedIn account? You might be surprised to see there’s more than one option. Before you even get to deciding between subscription tiers, you first have to make a bigger choice. LinkedIn Premium or LinkedIn Sales Navigator?
To help you decide, here’s an overview of each account type.
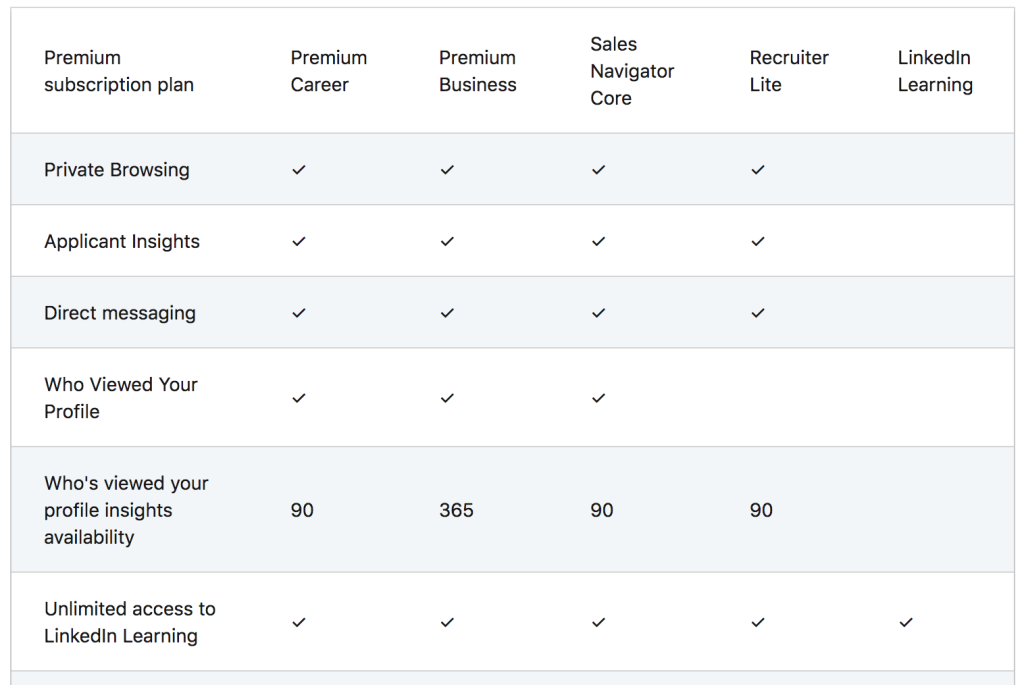
LinkedIn Premium
When you venture beyond a basic (and free) LinkedIn account, LinkedIn Premium might be the first option you encounter.
LinkedIn Premium Career and Premium Business are paid subscriptions that allow you to access extra features such as Private Browsing and Who Viewed Your Profile. You also get access to unlimited LinkedIn Learning with these subscription types, as well as 5 InMail credits on Premium Career and 15 InMail credits on Premium Business.
While these features might be useful to jobseekers and companies solely focused on maintaining their LinkedIn presence, opting for one of these subscription types means you’re missing out on a whole host of LinkedIn prospecting tools.
LinkedIn Sales Navigator
The Sales Navigator lead lists and powerful search features are by far the most useful tools LinkedIn offers for prospecting.
All Sales Navigator subscriptions give you access to:
- Advanced search,
- Sales spotlights,
- Lead and account recommendations,
- Sales preferences,
- Saved lead and accounts lists,
- Custom lists, Alerts, and Notes,
- The Sales Navigator mobile app.
If you’re serious about growing your business, you need a Sales Navigator account, not LinkedIn Premium.
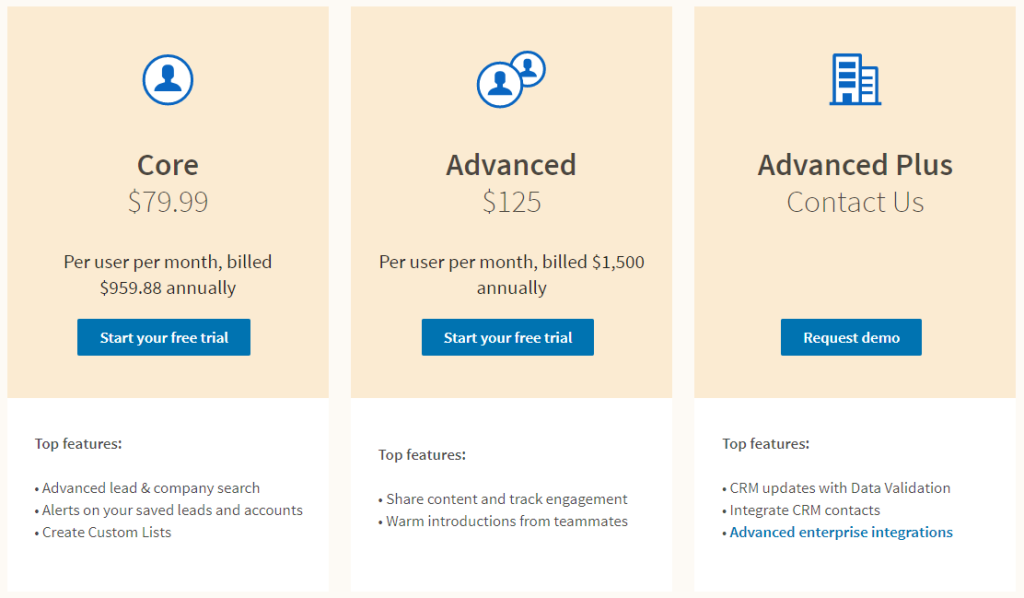
LinkedIn Sales Navigator Core, Advanced, and Advanced Plus
To get the most out of the platform, you need Sales Navigator for LinkedIn. But which subscription tier should you opt for? LinkedIn now offers 3 separate Sales Navigator packages: Core, Advanced, and Advanced Plus.
To help you work out which one best suits your business needs, here’s a breakdown of what you get in each.
Sales Navigator Core
LinkedIn’s Core package is its cheapest Sales Navigator tier. It’s best suited to companies who want access to the dashboard, filters, and lead and account lists without extra frills.
In addition to Sales Navigator access, the Core package comes with 50 Inmails a month, access to LinkedIn learning, and sales spotlights to help you find the right leads.
Sales Navigator Advanced
The Advanced package is for more serious LinkedIn prospectors and is suited to those at larger companies who want to collaborate with teammates or track outreach performance.
In addition to the features above, the Advanced package includes:
- Access to SNAP, LinkedIn’s Sales Navigator Application Platform, which offers integrations that allow you to connect the sales tool to other parts of your sales stack.
- Buyer interest alerts, to help you discover prospects ready to make a decision.
- TeamLink and TeamLink Extend (tools that help you engage with members of existing teammates’ networks).
- The ability to add smart links to outreach messages to track leads’ engagement with content.
For administrators or those with specific company requirements, the Advanced package offers the following features that might make it the choice for you:
- Access to usage reports for account administrators
- Centralized billing, with multi-year and volume discounts
- A dedicated Account Manager
- Single Sign On (SSO)
Sales Navigator Advanced Plus
Advanced Plus is LinkedIn’s most extensive Sales Navigator package. In addition to the features outlined in Core and Advanced, Advanced Plus comes with:
- Advanced CRM integrations for Salesforce and Microsoft Dynamics 365 Sales
- The ability to sync LinkedIn activity with Salesforce and Microsoft Dynamics 365 Sales
This bespoke package is the one to go for if you’re a larger organization looking to improve the sophistication of your tech integrations. It’s only really worth it if you’re an existing Salesforce or Microsoft Dynamics 365 Sales user. Companies on a budget or using a different CRM can integrate their CRM with LinkedIn using a third-party tool like Salesflow.
If you look at the price of Sales Navigator and think “oof… that’s a lot of money every month”, you’re not wrong. However, businesses have seen up to 3000% ROI using the tool. So don’t hinder your revenue potential tomorrow by being afraid to make a good investment today.
Getting started with LinkedIn Sales Navigator
Now that you know which package is right for you, it’s time to get going.
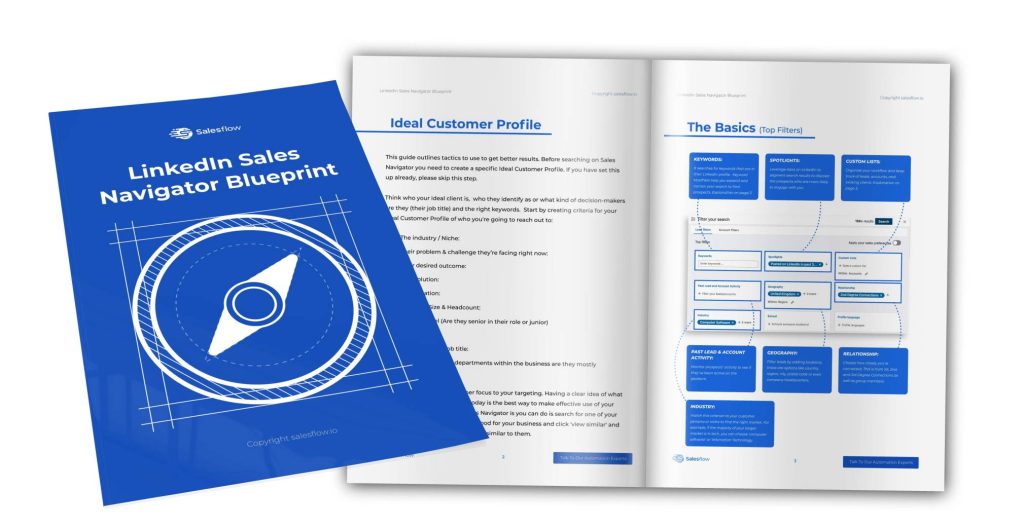
Sales Navigator Basics
The basics start by familiarizing yourself with the search filters. Before you go any further, make sure you’ve done the legwork to determine your Ideal Customer Profile (ICP). You can use the Sales Navigator search filters to find leads that exactly fit your ICP requirements — and even discover new characteristics of your ICP that you hadn’t previously considered.
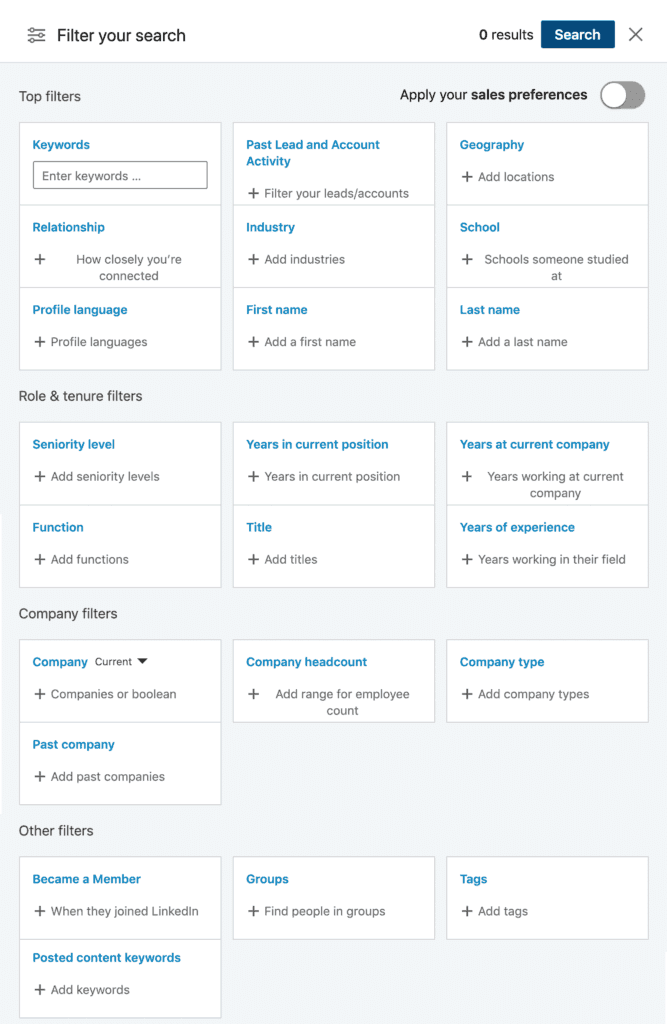
We recommend playing around with the filter combinations and seeing what results you get. Familiarize yourself with the search function and it’ll soon be as easy and intuitive as a Google search.
Some basic filters we recommend would be Title (decision-makers), Geography (for the region you cover), Company Size (what capacity can you handle), and Industry (who you focus on).
Some of the most useful more advanced Sales Navigator search filters include:
- Seniority level: filter by leads that have buying authority
- Past lead and account activity: find leads that have engaged with your company before
- Groups: join relevant prospect groups then reach out to them using a Groups and Events campaign
- Posted content keywords: find leads that care about what you’re selling by filtering for members who’ve posted about your addressable pain points

How to Write a Boolean Search
Combining a boolean search with LinkedIn Sales Navigator can help you find the most relevant prospects.
But how do you write a boolean search? It’s a lot simpler than you think. There are many boolean generators out there you can use, but honestly, they’re very basic. We recommend learning how to write your own. We even have a downloadable guide to creating your own Sales Navigator boolean searches.
First, with every Boolean search, you start with open and close brackets. The basic format looks like this: (“Keyword” OR “Keyword”).
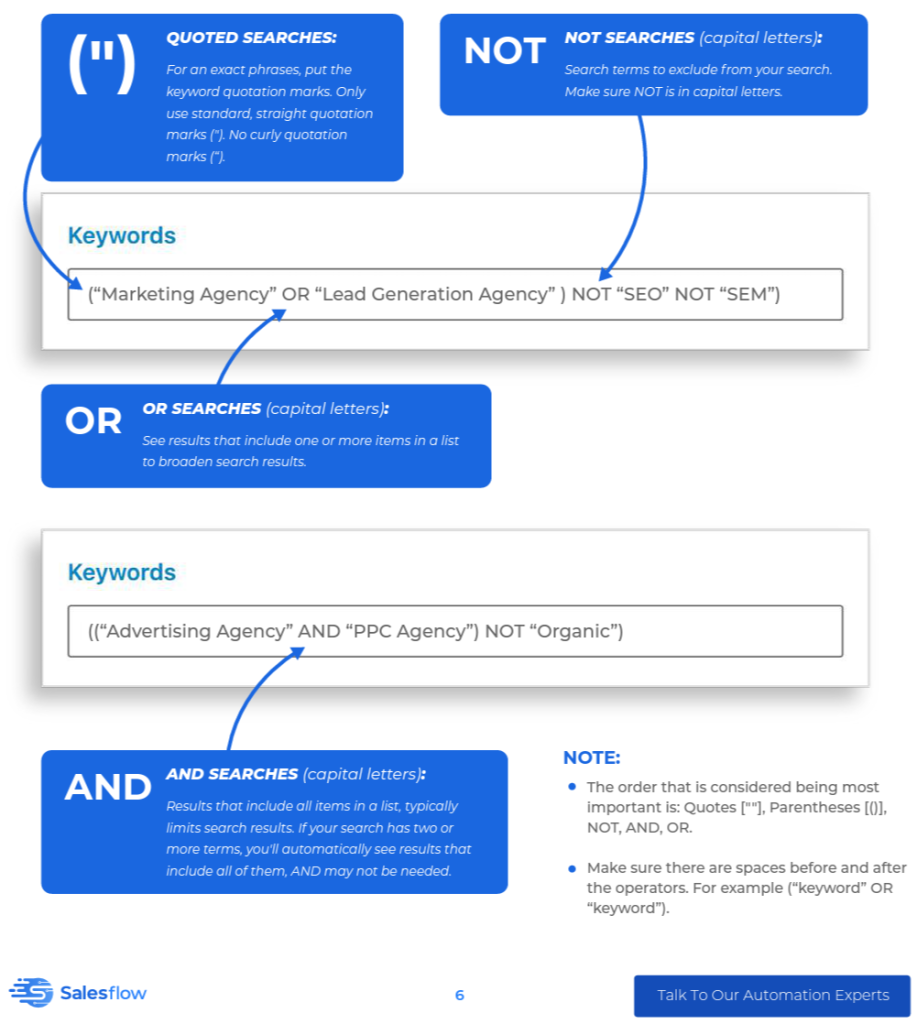
In any boolean search, you usually want to specify words to exclude from your results. This helps make your search results more accurate and specific to your needs. For example, if you were searching for Senior Vice Presidents, you might want to exclude “school”, “college” and “university” to avoid getting a list of contacts that aren’t involved in business.
The best way to do this is to keep the keywords you want in the inside bracket () and excluded keywords in the outside bracket. It would be written a little something like this:
((“keyword” OR “keyword”) NOT “keyword” NOT “keyword”)
Now, you may be thinking “great! I can shove everything into the keyword filter!”
Well… yes, you can, but then you will get bad results, and you’d be better off using a normal LinkedIn search.
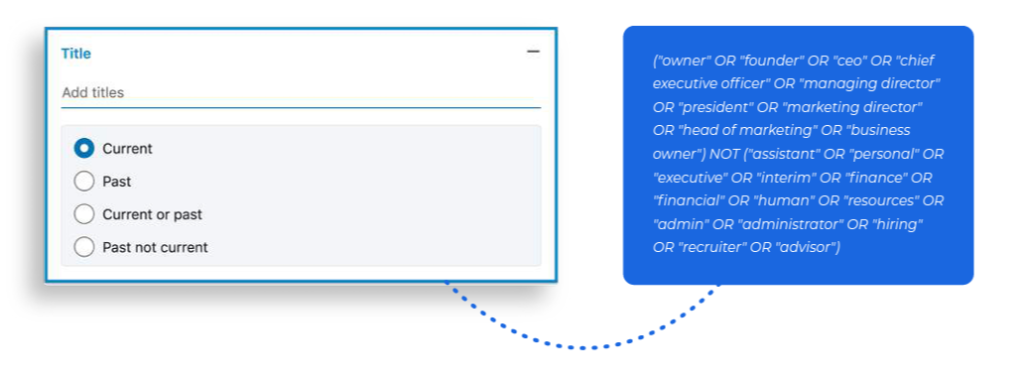
To narrow down your results without creating horribly long boolean search terms, use the search filter dedicated to your chosen keywords. For example, do a boolean search for Job Titles in the “Title” filter to get accurate results.
Things to note:
- The OR, AND, and NOT must be in capital letters and not in quotation marks
- You can’t use AND, OR, or NOT in the same brackets
- You can combine AND and NOT / OR and NOT but not AND and OR
- Keywords must be written between quotation marks “like this”
Get the complete guide to boolean searches for Sales Navigator.
Creating & Saving Lead Lists
Now you know how to use filters to find your ICP, it’s time to hit search!
When you search on LinkedIn Sales Navigator, you will immediately see results, but these results aren’t static. If you leave the page, you might not be able to find the same leads again.
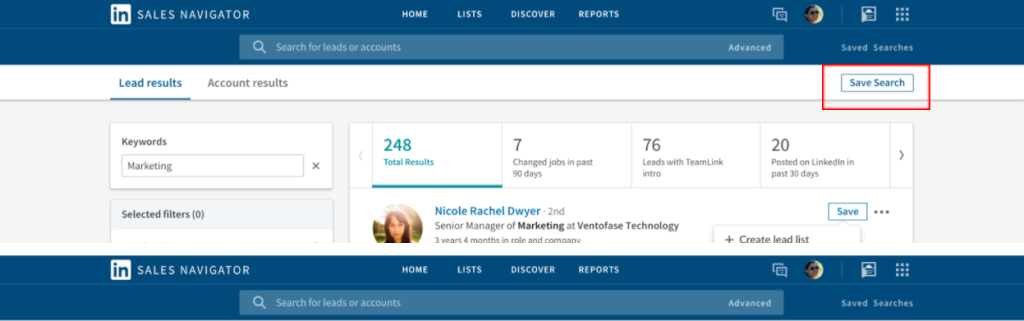
To keep track of results, you’ll need to create and save some leads to lead lists. But before you do that, a handy trick that’ll save you lots of time is to save your search filters.
In the search results, at the top right corner, you will see a save search option. This is especially useful when you’ve used multiple filters and a boolean search: it’ll save you writing it all out again in the future.
Now you have a saved search, you can run it whenever you like. However, the results will frequently change. To keep track of profiles and prospects, you’ll need to use saved Lead Lists and Account Lists.
In your lead results, you have 2 options:
1) Add individual profiles to a list
2) Select multiple profiles and add them to a Lead List.
Unfortunately, there isn’t an add-all option, mainly because LinkedIn wants you to handpick your leads and not spam people.
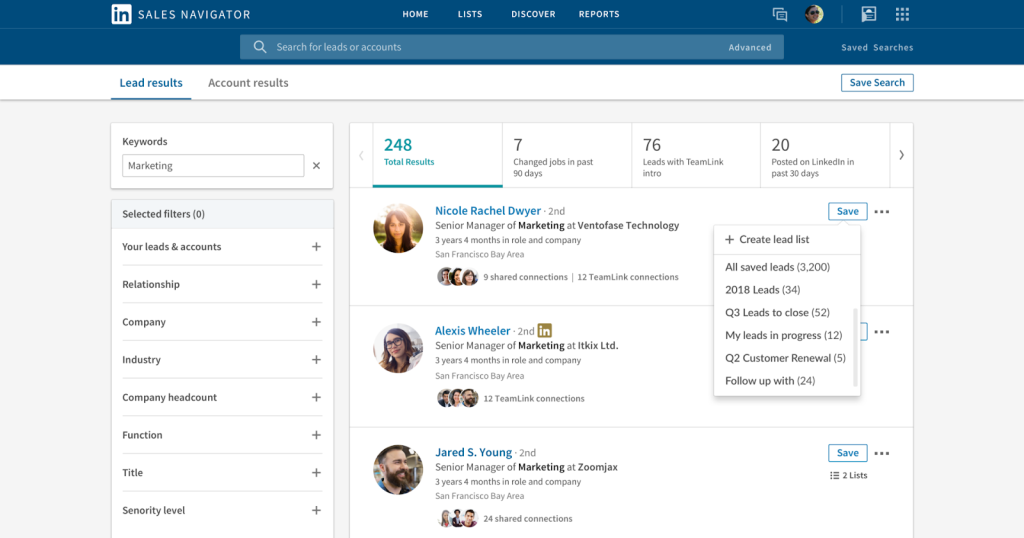
Adding individual profiles to Lead Lists
In the leads results, you should see a save option. Clicking it will give you a dropdown menu. In this menu, you will see any Lead Lists you’ve already created. You can add this profile to an existing list or create a new Lead List.
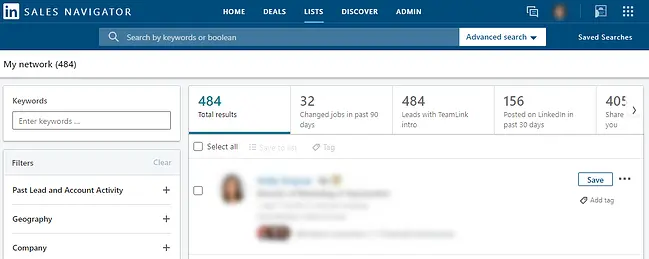
Selecting multiple profiles and adding them to Lead Lists
You can select multiple profiles and add them to Lead Lists. You can either manually select multiple profiles, or click ‘select all’ to choose all the profiles on the current Lead results page.
‘Select all’ won’t add any profiles from other pages: you’ll have to click through to each page to add them all. It’s inconvenient, but at least you can filter out any leads that don’t match your ICP right away.
Once you have your saved list of leads, you can start researching the profiles and adding relevant information to the ‘notes’ tab for future outreach. Or you might want to go ahead and connect with them, or use one of your 50 InMail credits.
Here’s an example of the type of message you can send to connect:
Hi {first_name},
LinkedIn suggested that we already know each other, but I do not think that we have met.
I see that you are the {job title} at {company_name} and I thought that it would be great to connect with you.
{Your name}
Remember, the key here is personalization. Check out our 100+ LinkedIn outreach messages template for personalized outreach that gets results.

Setting Sales Preferences
LinkedIn Sales Navigator comes with handy lead and account recommendations to keep your pipeline full of relevant leads.
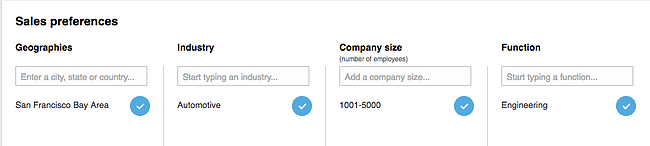
To make sure the recommendations align with your ICPs, change the criteria for these automatic recommendations in the Sales Preferences settings. You can specify region, industry, function, and seniority level.
To add or modify these settings, click your profile picture in the top right corner and choose “Settings.” Then scroll down to the Sales Preferences section, type your choices, and click “Done.”
These recommendations will match the search filters you set in your sales preferences. LinkedIn won’t take into account any filters from your other saved searches or filters. This means that the results will include some profiles you won’t get in your other searches.
Advanced Sales Navigator Lead Lists
Creating Lead Lists is easy but it can get messy very quickly. So, let’s take a step back and look at how you can do this most efficiently
No matter what, your ideal customer profile is not something you want to compromise on. However, adding extra filters to your existing ICP can take your leads from qualified to highly qualified: saving you hours of sifting in the process.
Here are some search filters we recommend you use.
Account-based
While your company might service businesses of any size, you might get better results targeting large enterprises over SMEs. You can do that by selecting sizes 250+ in the “Company Size” filter. Add this to your ICP filters to generate higher-value deals.
Interest-based
When it comes to outreach, the more personalization the better.
You can use the ‘Interested In’ filter to figure out which buyers would most benefit from your service or be interested in your tool. This will give you a major advantage when reaching out.
For example, you can run your normal search for “Head of Sales” and in the Interested In filter, you can add “Business Development Tools”. You can use this to approach them and offer your services to complement their interests.
Activity-based
This one is self-explanatory. Just because someone has a LinkedIn profile, doesn’t mean they’re active on there and you don’t want to waste your time on inactive leads.
So in the Activity filter make sure you select active in the past week, 2 weeks, or even 30 days.
Recently Started a New Role
This one is something that a lot of sales professionals forget. When a high-level decision-maker joins a new company, it’s because they’re there to make changes and improve the business.
This is the perfect time to reach out to them and offer your services.
An easy way to reach out to them and get a reply is to congratulate them on their new position.
Expert Sales Navigator Hacks
Well, that was intense! But now you know everything you need to use LinkedIn Sales Navigator.
Next, we’re going to share with you some things that are not so obvious: some really good LinkedIn hacks that will put you ahead of your competitors. Let’s get started!
Sync Sales Navigator with your CRM & Validate your Data
LinkedIn has partnered with several CRM providers including HubSpot, Microsoft Dynamics, Salesforce, Zoho, and Infor so you can sync information between Sales Navigator and your CRM.
Unfortunately, the CRM sync feature is only available on the Sales Navigator Advanced Plus subscription, but if you do have this, it means you won’t have to do your data input into your CRM manually.
Not only that: by syncing directly to your CRM, you can easily validate your CRM data and keep it up-to-date.
How many times has your point of contact in a company left for another company and not updated you? With the CRM sync, their title and company will be updated automatically once they change them on LinkedIn.
If you don’t have Sales Navigator Advanced Plus, there are other ways to integrate your LinkedIn activity with your CRM. Check out Salesflow’s native CRM integrations.
Bypassing the LinkedIn InMails Limit
As part of your Sales Navigator subscription, you get 50 InMail credits per month. This is nice, but 50 credits aren’t enough to do all of your outreach. But don’t worry. If you need more LinkedIn Inmails, we’ve got you covered.
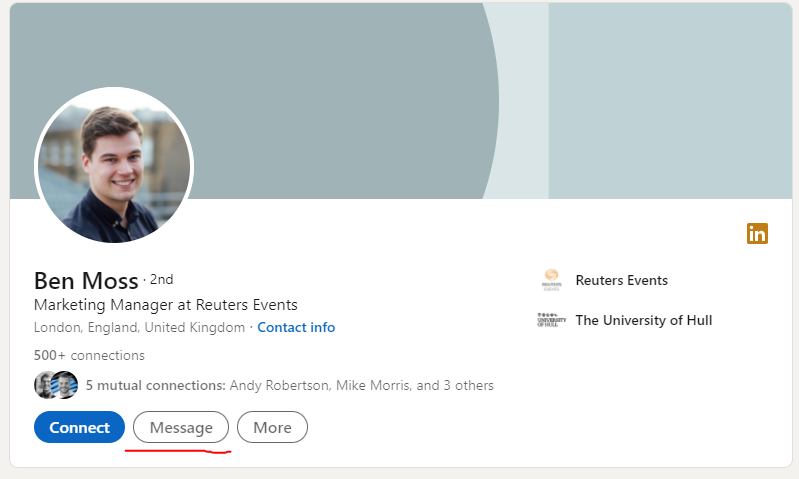
If you want to bypass the InMail limit, simply target users with “Open Profiles”. These accounts don’t count toward your InMail quota.
You can tell if a user has an open profile as they’ll have the message option unlocked on their profile page.
Saved Leads Lists Alerts
You’ll get better results if you reach out to leads at the right time. Creating lead lists with alerts based on specific activity triggers can help you keep up with prospect updates in real time.
For example, you can make a list of contacts from your won deals and set alerts for job (Company or Title) changes. If a lead moves to a similar position in a new company, you’ve got a great in to resell your service to them and close a new deal. And with LinkedIn alerts, your outreach will be perfectly timed!
LinkedIn Automation
Now that you have a powerful search tool, finding leads is easy. But what about the whole process of messaging, connecting, and following up with them? You can do all of your outreach manually but that would mean a minimum of 40 hrs every month spent sending messages alone.
A LinkedIn automation tool can send cadences on your behalf in the background. Instead of spending 4-6 minutes per lead, you can set pre-determined sequences live, load up ideal prospects using powerful search filters, and focus only on leads that are willing to talk to you.
That’s where Salesflow comes in. You can natively integrate Salesflow with LinkedIn Sales Navigator and directly import lead lists into automated outreach campaigns.
Here are just a few of the ways Salesflow helps you generate more qualified leads:
- Reach 120 leads every day
- Set up multiple campaigns to target different ICPs with follow-up messages
- Hyper-personalize your campaign messages
- Integrate with your CRM to add leads to campaigns automatically.
Using a LinkedIn Automation tool is an efficient and powerful way to generate highly qualified leads. Companies using Salesflow save up to 50 hours a week and see a 10-20x ROI.
How to use Salesflow to create automated LinkedIn campaigns
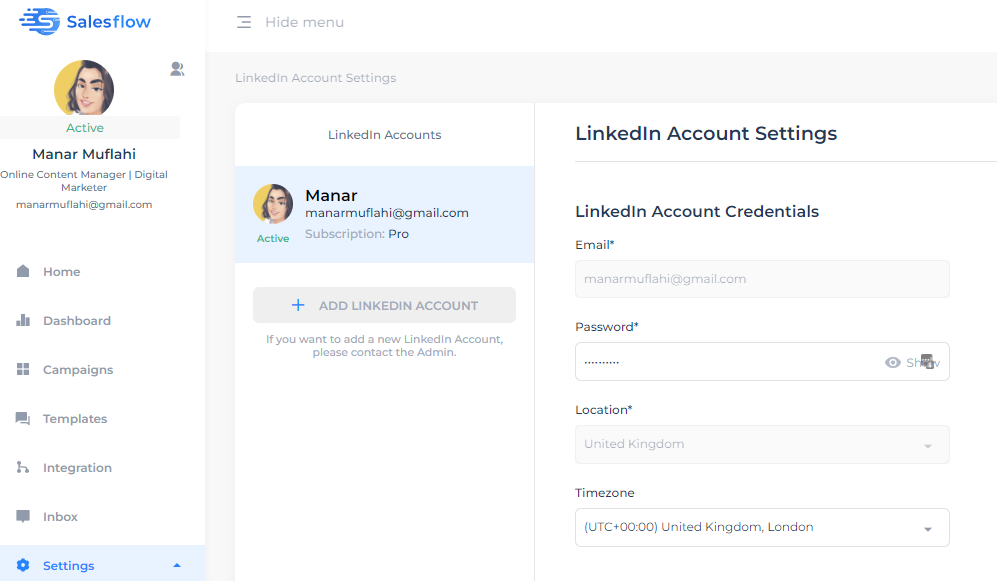
Step 1: Connect your LinkedIn Account to Salesflow
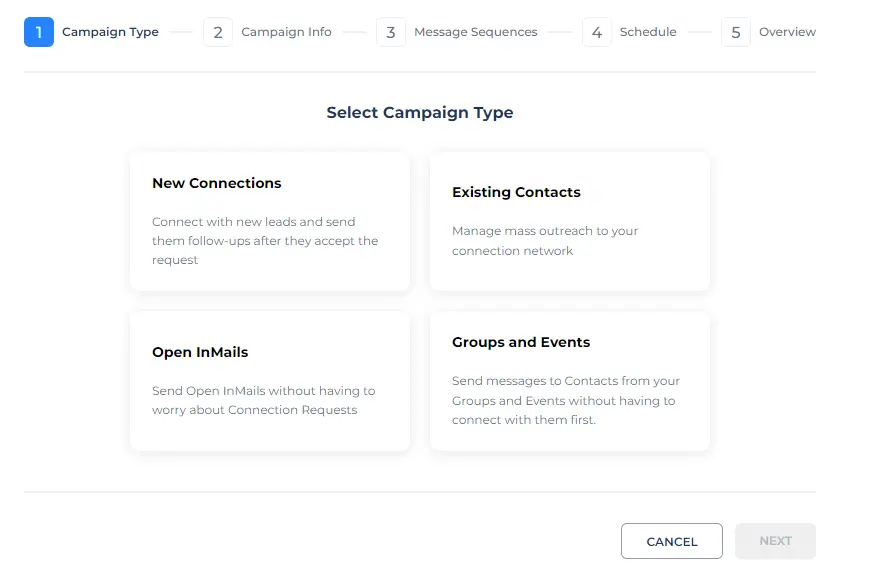
Step 2: Create your hyper-personalized automation campaigns with follow-up messages. You can run 4 different campaigns:
- New connections (20 per day)
- Existing connections (unlimited)
- Groups and Events (50 per day)
- Open InMails (50 per day)
Step 3: Import your Lead Lists (or complete a new Sales Navigator search right from within your Salesflow dashboard).
Step 4: Track campaign performance with advanced reporting and analytics. Use the AI-driven lead management inbox to prioritize leads that engage positively.
Get more out of LinkedIn Sales Navigator
Sales Navigator is a powerful tool you can use to skyrocket your LinkedIn lead generation. It’s an investment that any sales professional should make to take their outreach to the next level.
Ready to up your lead generation game with LinkedIn and Salesflow? Try a 7-day free trial today:
If you enjoyed this post, here are some more growth hacks you can leverage:
- 3 ways to bypass the LinkedIn connection limit
- How much time and money can a LinkedIn Automation Tool save you? Let’s talk numbers
- How to use LinkedIn Groups & Events to generate leads
- 13 LinkedIn outreach strategies for 2023 results
Want to get even better results? Download our step-by-step guide to generating Sales Navigator leads.