.png)
Every day, thousands of sales professionals log into LinkedIn Sales Navigator, run a quick search, and blast generic messages to hundreds of prospects.
Most get ignored. Some get blocked. Very few get responses.
The difference between those who struggle and those who succeed isn't the tool itself; it's how strategically they use it.
If you're tired of low response rates and want to build lead lists that convert, this guide will show you exactly how to leverage Sales Navigator's full potential.
You'll learn three progressive strategies that will help you move from basic filtering to account-based targeting, ultimately creating highly qualified prospect lists that decision-makers want to engage with.
What you'll learn:
- The foundational lead filtering approach that most people get wrong
- How to use account-based targeting to identify high-intent companies
- Advanced combination strategies that maximize both quality and conversion rates
- Real-world use cases with specific filter combinations that work
By the end of this guide, you'll have a systematic approach to lead generation that focuses on quality over quantity. Let's dive in.
Level 1: How to search for Leads on Sales Navigator
When it comes to LinkedIn lead generation, Sales Navigator is the ideal tool for precise and targeted outreach. Its features enable you to filter the leads that match your ideal customer persona.
The majority of Sales Navigator users don’t utilise the tool to its full potential, with very few having a concrete workflow in place to best target potential leads.
Successful prospecting on LinkedIn comes from conducting a successful search on Sales Navigator and building your lead list. The more specific you are, the more leads you will reach that would genuinely be interested in what you are offering.
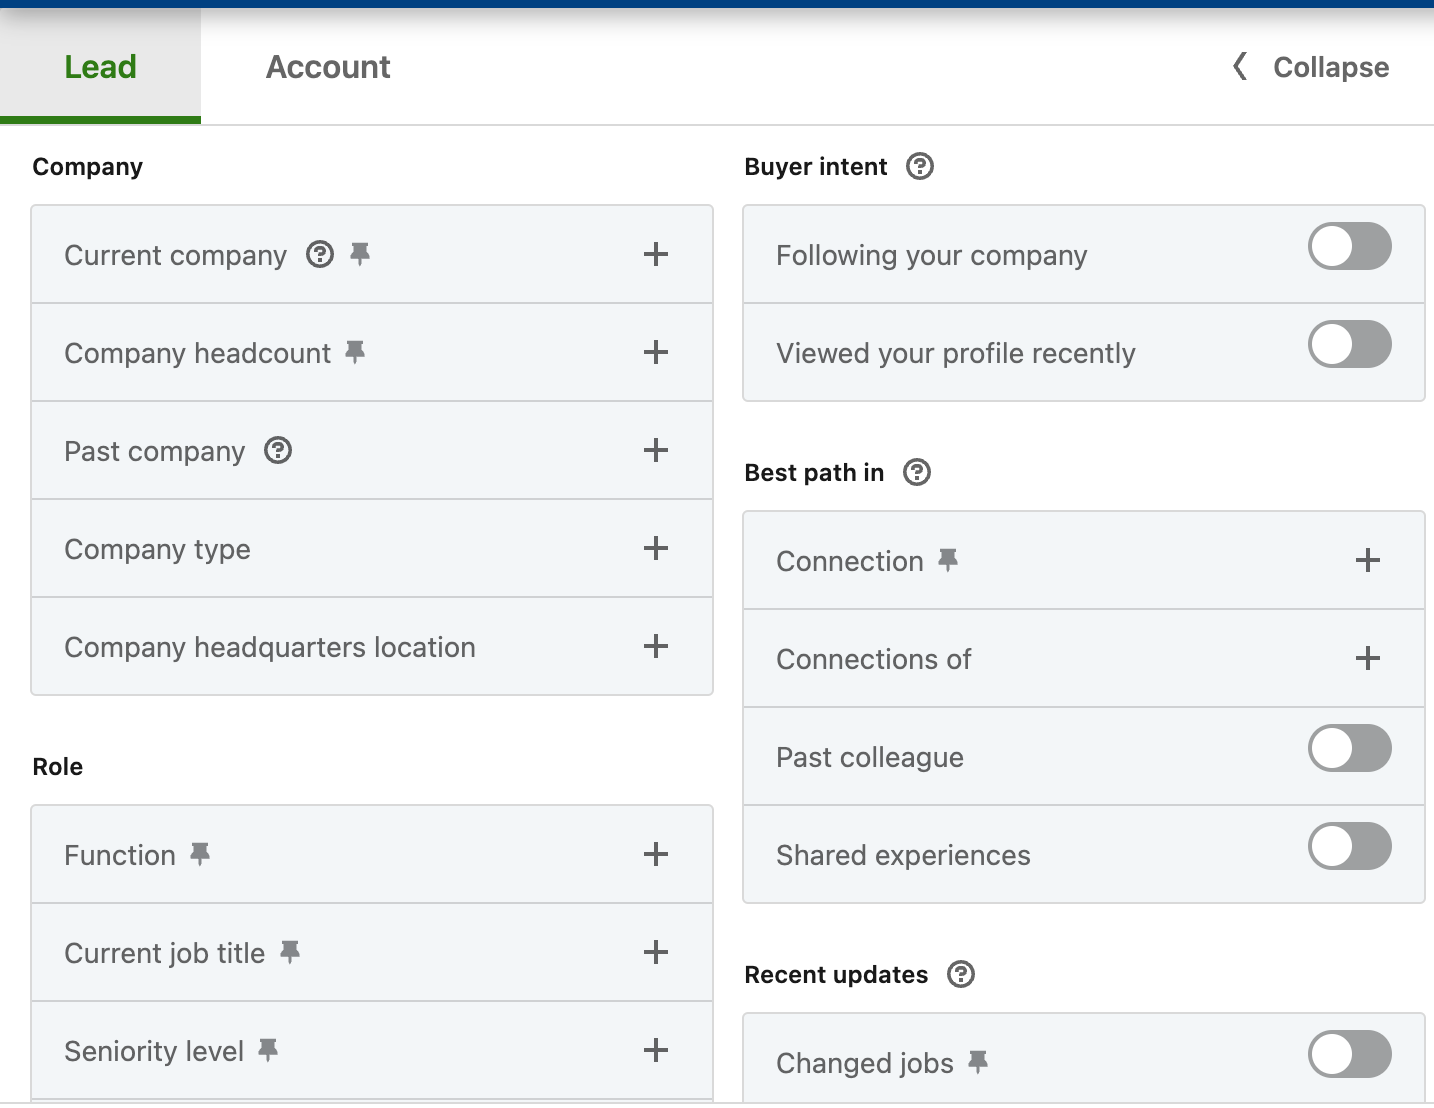
Step 1: Open Sales Navigator -> Lead Filters

Here is where you can include many filters in order to narrow down your search and find the best leads for your goals.
This can include industry, role function, geographic location, seniority level, and more:
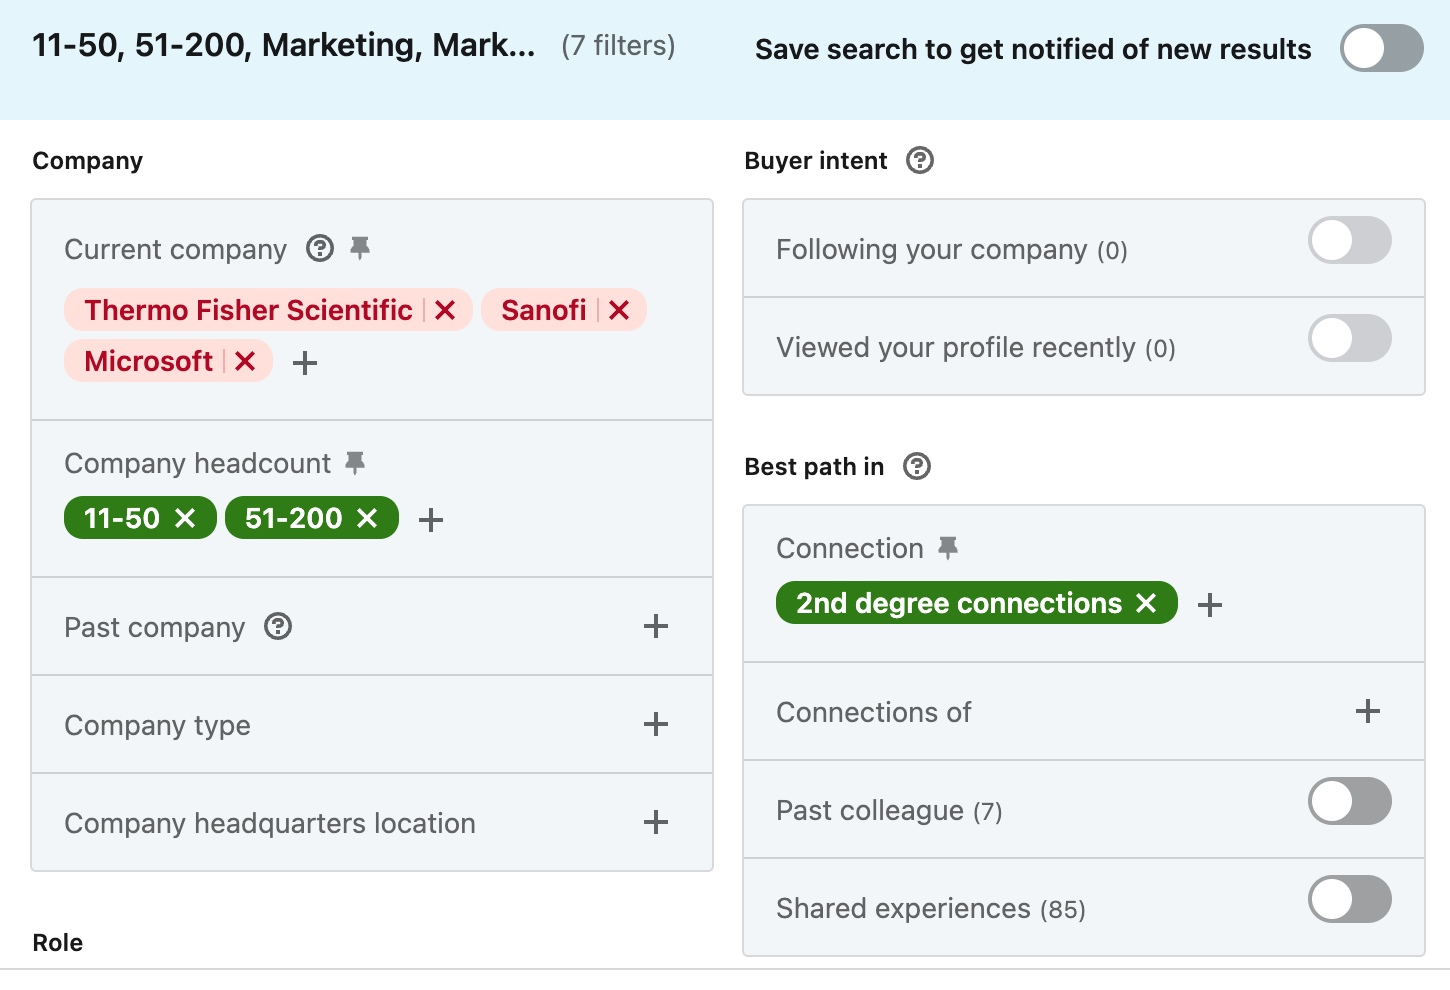
Step 2: You can include or exclude filters as necessary. For example, excluding companies you are currently working with is probably a good idea if you are looking to offer your services:
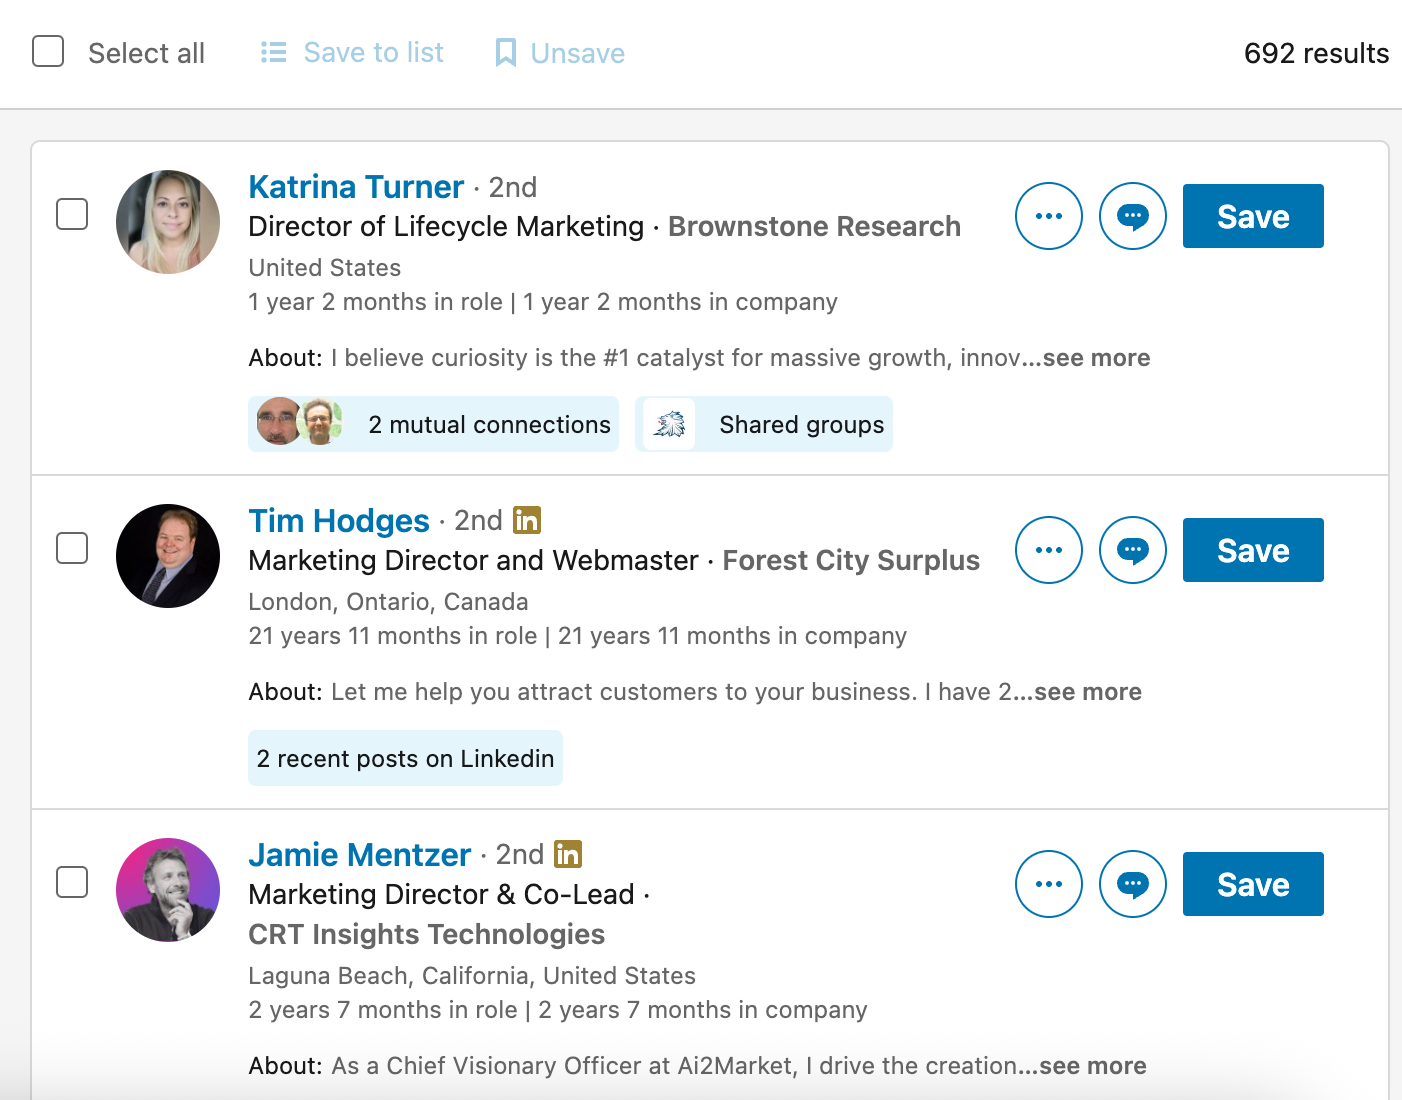
Step 3: With all of our filters in play, we managed to narrow down the list from 90k+ possibilities to only 692 leads who have a high chance of being genuinely interested:
Let’s take a look at an example to understand this better.
Use Case: Targeting Mid-Level Marketing Leaders in the US Tech Industry
Scenario:
You’re a SaaS startup offering a marketing automation platform and want to identify potential customers in the tech industry.
Your goal: Find mid-level to senior marketing leaders in medium-sized US-based tech companies.
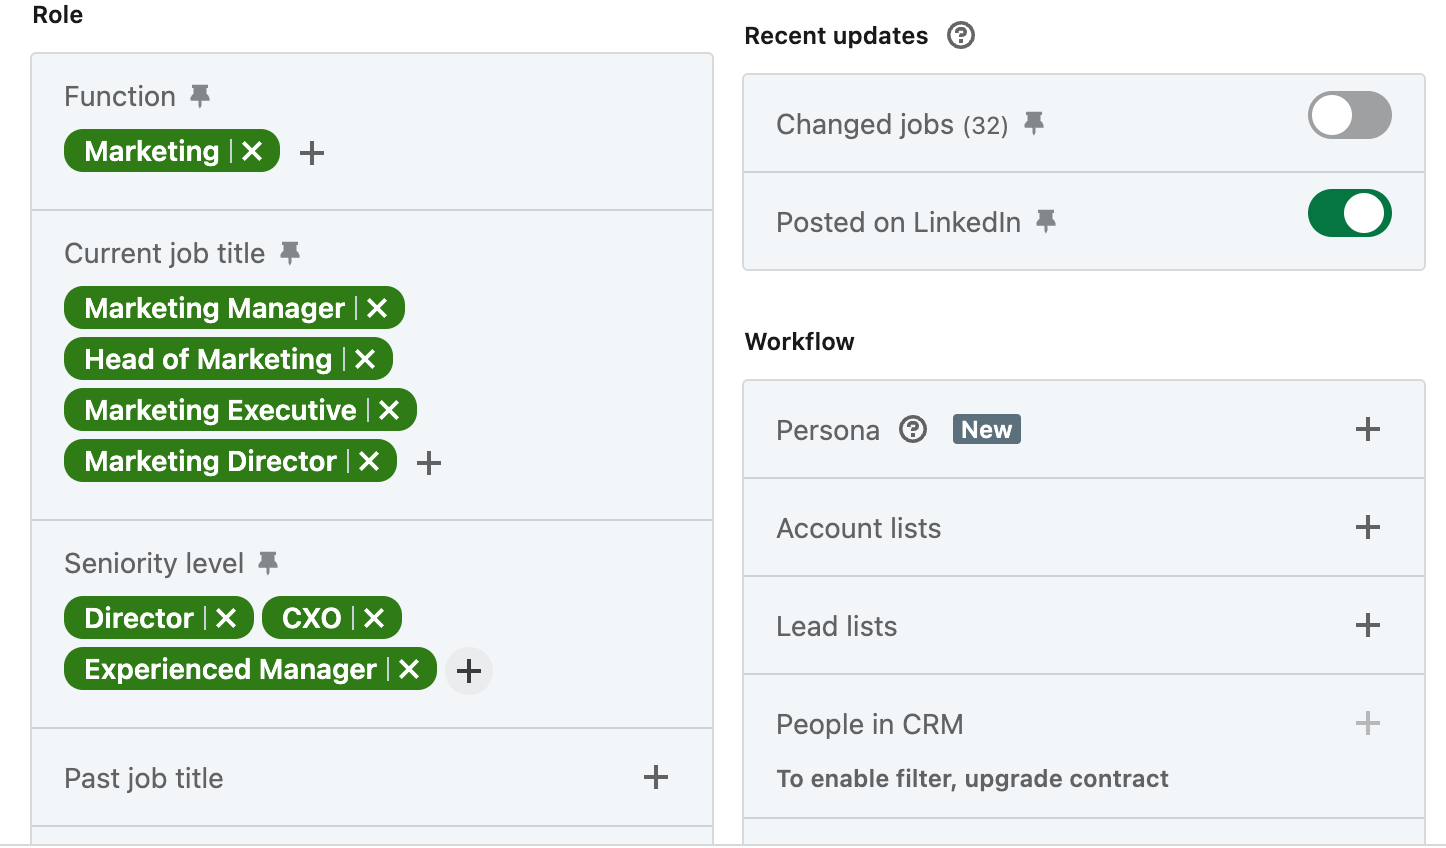
Filters Applied:
- Title: ‘Marketing Manager’, ‘Head of Marketing’, ‘Marketing Director’
- Company size: 51-200 employees, 201-500 employees
- Industry: Information Technology & Services, Software Development, Technology
- Location: United States (you can also narrow this down to specific states even)
- Seniority: Manager, Director
- Function: Marketing
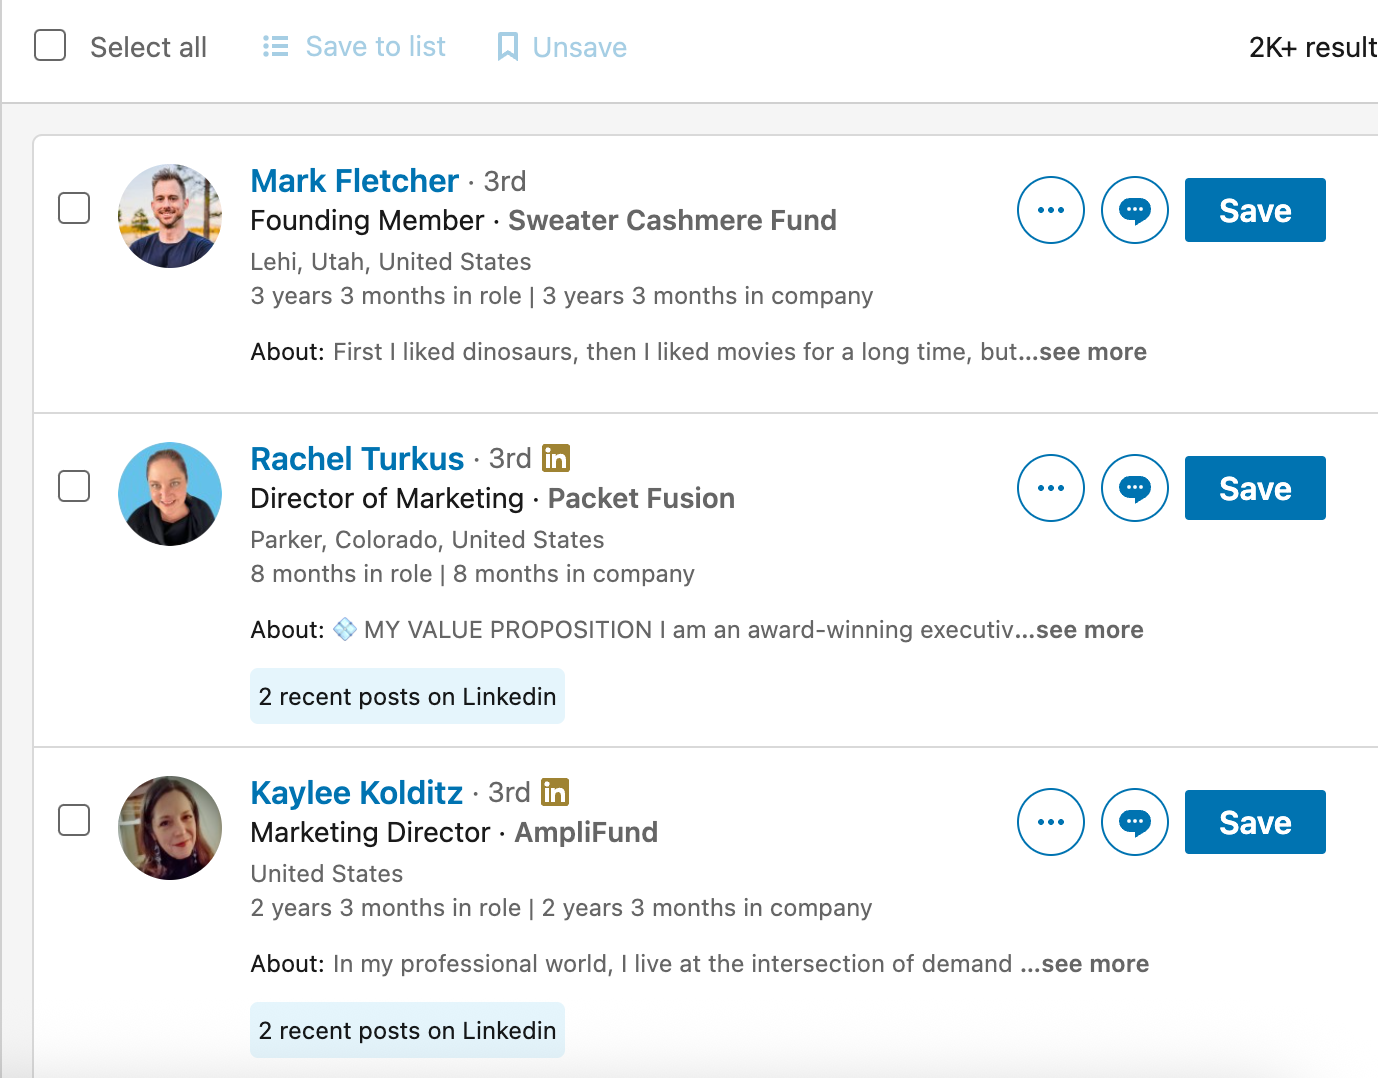
Result:
You have generated a list of about 2000 targeted leads across relevant industries and locations, which will keep a campaign going for about 5 months!
Now, once you have applied all the relevant filters and completed your search, you are ready to import the list and begin your campaign targeting potential clients!
Level 2: Company First Lists
The next level in list building is Account-based, which essentially means you are going for specific companies that are likely a better fit for your business.
For instance, you can decide to go for companies that are currently hiring or have received funding recently; these companies may be in a better position to work with you.
This will take a little bit more time than the basic search, but it can make a huge difference. To do this, please see the steps below:
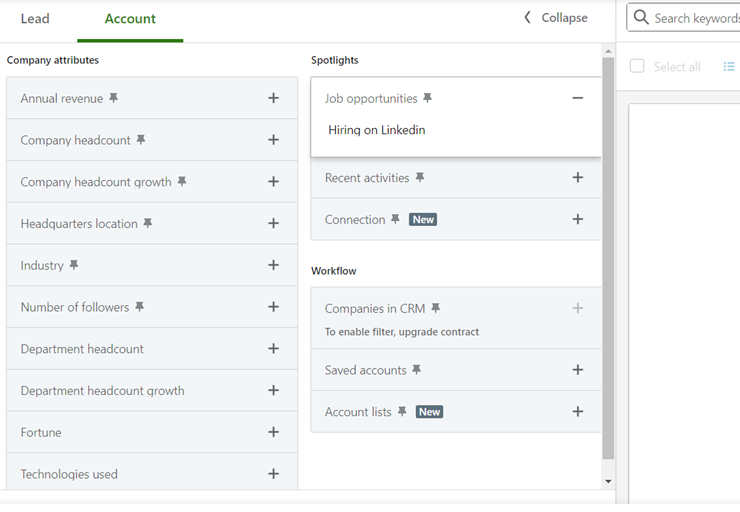
Step 1: Open Sales Navigator -> Account Filter +

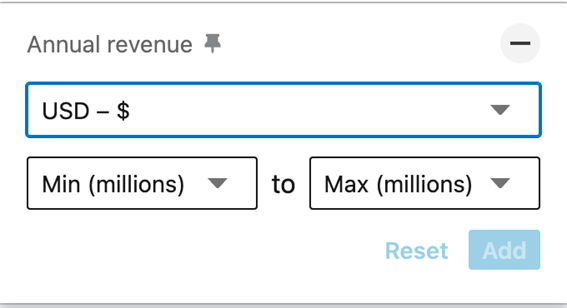
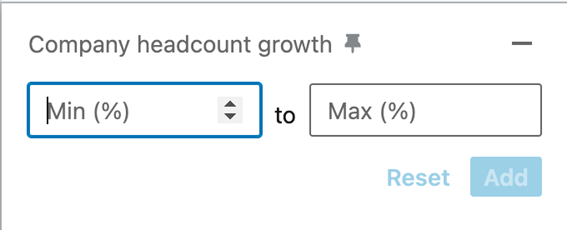
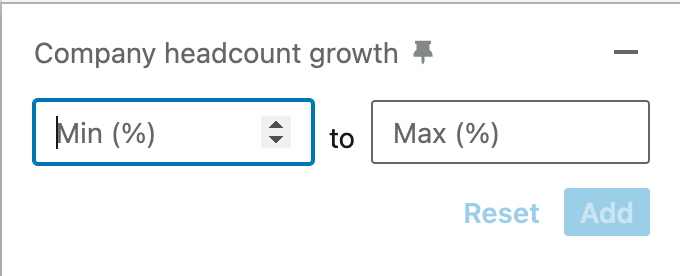
Step 2: Enter all account filters you need, we have the basic filters such as Location, Industry, Headcount and so forth. We also have special filters such as Recent Activities, Annual revenue, company headcount growth, Hiring on LinkedIn, etc.
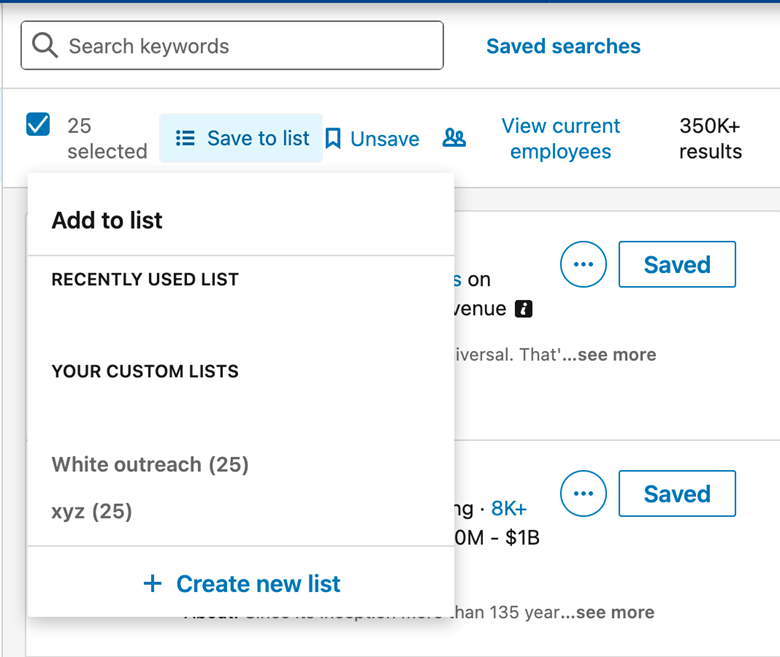
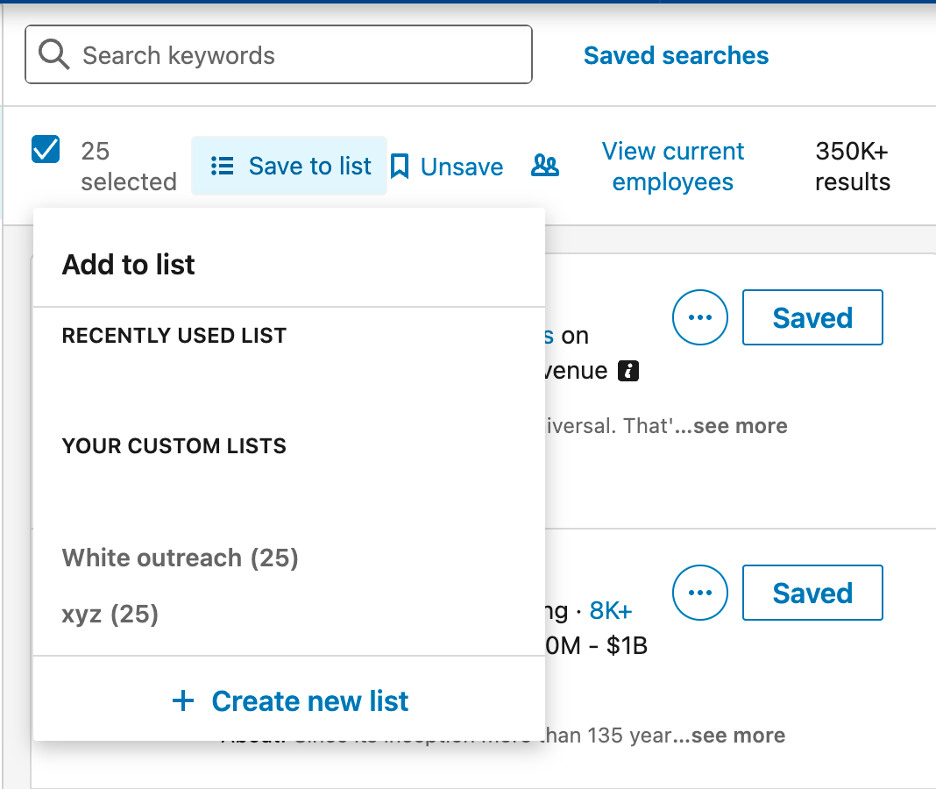
Step 3: Once you select all your filters, manually select the companies you’d like to work with. If it’s all of them, click “select all”

Step 4: Click “Save to list” -> either create a new list or add to an existing one, depending on your need. Now, continue adding companies to this list until you have a decent number. Depending on your Ideal Customer Profile (ICP), this could be anywhere between 50 and 200 companies.
You will need to go page by page until you finish; there’s no way around it.
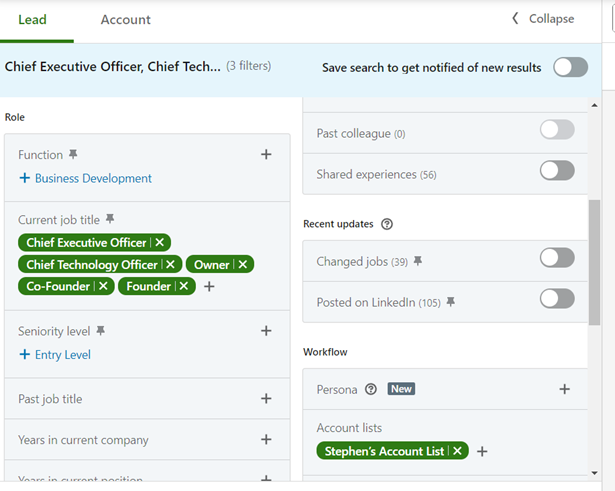
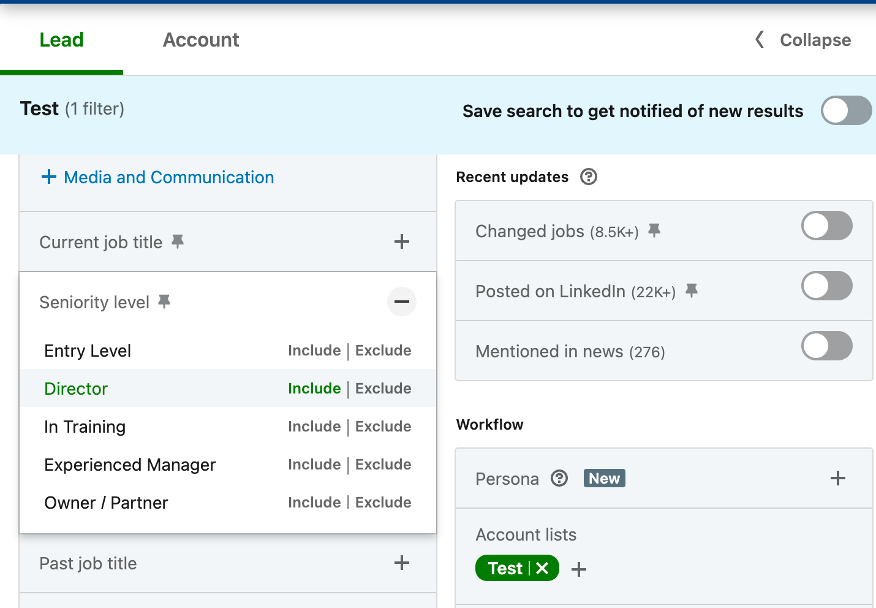
Step 5: When you have your Account List ready, go back to home -> click on Lead filters

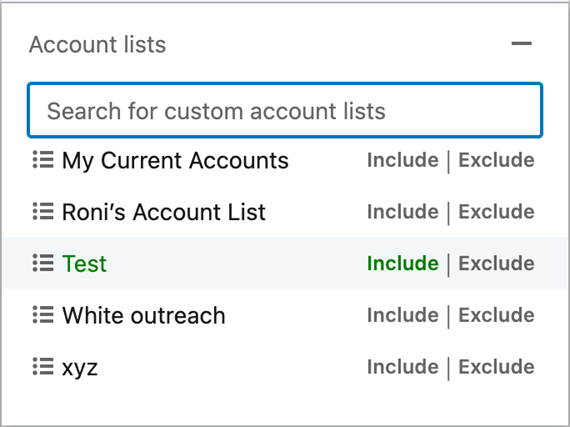
Step 6: Scroll down to Workflow -> Account lists -> Select the Account list you just saved
Step 7: Now you have a list of all the people who work at the companies you want to target.
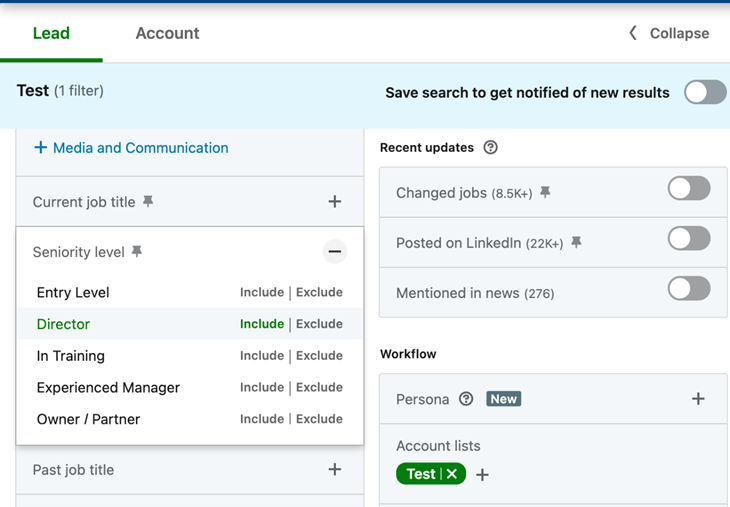
The next step is to add more filters to get your ICP, so you need to select Job Title or Function and Seniority, etc.
Step 8: Once you are happy with the number and quality of your leads, you’re ready to import it!
Now you have a list that has been pre-vetted from the company level for the system to send messages to. This will increase the quality of your list while minimizing your manual work.
Let’s look at an example here for ease of use.
Use Case: Targeting High-Level Leaders in Small Companies in Finance Services
Scenario:
We are a startup offering a fintech tool, and we want to partner with small companies because they are more likely to need our product.
We know most small companies are budget-conscious, and our technology could be out of reach for a lot of them, so if we just do our list on “lead filters” and focus on the people, we may end up talking to companies that are not a financial fit for now. It is still good to have these conversations of course, you never know what the future holds!
But ideally, we want prospects who can afford us now.
Your goal:
When you want to do outbound with the account-based ICP:
- Your ideal customer profile is small companies in the Finance space. These companies are ideal because they need efficient tools that are lean and cost-effective, given their size.
- You need to focus on accounts with particular signals, such as:
- Recent headcount growth and/or actively hiring
- Companies that secured funding in the last year
- Your outreach is geographically focused on specific regions, in this case, the United States.
Filters applied:
- Account filters first to find out companies
- Select said companies and create an Account List.
- Use the Account List in your Lead Search to find specific people within those companies.
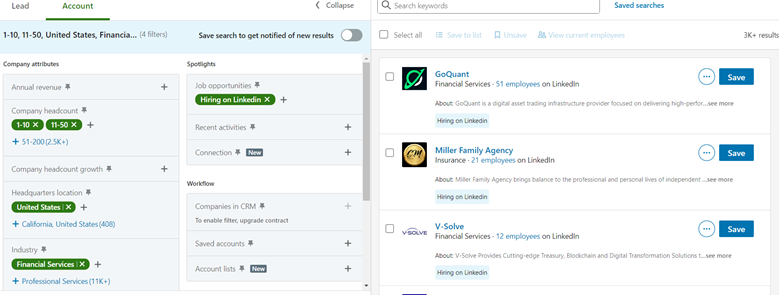
Please see examples below:
So, if we focus on the companies instead and we narrow it down to those that, say, have received funding in the last 12 months, we have 79 that could be very good prospects and in a good financial position to invest in your offering.
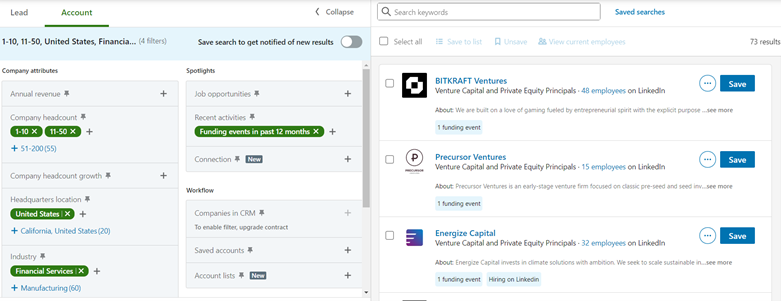
OR perhaps they have not received funding, but they are doing great and are actively hiring, which indicates growth and thus makes it more likely they can afford us.
Result:
Now we have over 3,000 companies we could potentially work with:
Having this huge list of companies means we can find thousands of possible people we can target and talk to.
Say, we save 500 companies for the first round in our Account List, and then we select ICP.
In this example, since we are going for small companies, we have a good shot at talking to C-suite leaders or higher-ups in the company.
If we have 500 companies, and we get 1-3 people per company, we are looking at anywhere between 500-1500 people (perhaps more, depending on the titles we choose) for our search.
That’s more than enough to keep a very good, highly targeted campaign running for 1-4 months (and we will still have over 2.5K companies left to target).
In the next section, we will show you the “final boss” level of list building on Sales Navigator.
Level 3: Combine Leads and Companies, and manually vet contacts
This is the most comprehensive list-building practice that would guarantee a high ROI for your outreach.
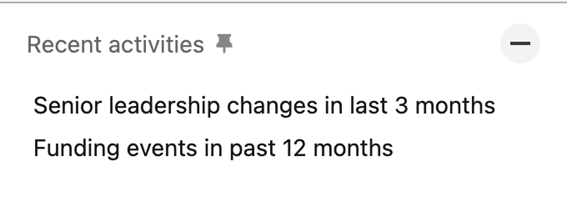
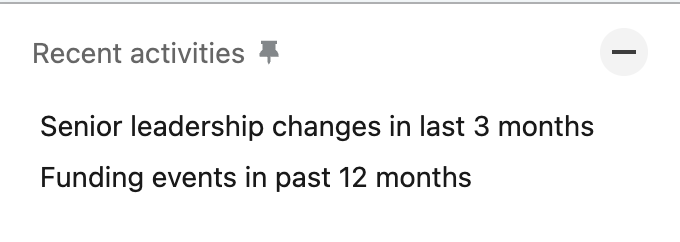
Purpose: Target people in companies that might be a better fit for your service. Companies such as those with seniority changes in the past 3 months, received funding in the last 12 months, etc.
Step 1: Open Sales Navigator -> Account Filter +

Step 2: Enter all the account filters you need. You also have access to special filters such as Recent Activities, Annual revenue, company headcount growth, etc

Step 3: Select the companies that fit your criteria. If all fit, select all.

Step 4: Click “Save to list” -> either create a new list or add to an existing one, depending on your need
Step 5: Go back to home -> click on Lead filters

Step 6: Scroll down to Workflow -> Account lists -> Select the Account list you just saved

Step 7: Now you have a list of people in the companies you want to target, you then add more filters to get the people you want, such as title, seniority, etc.
Step 8: From here, vet each contact to make sure they are the best fit for your outreach, select the leads -> click “Save to list” -> either create a new list or add to an existing one, depending on your needs.
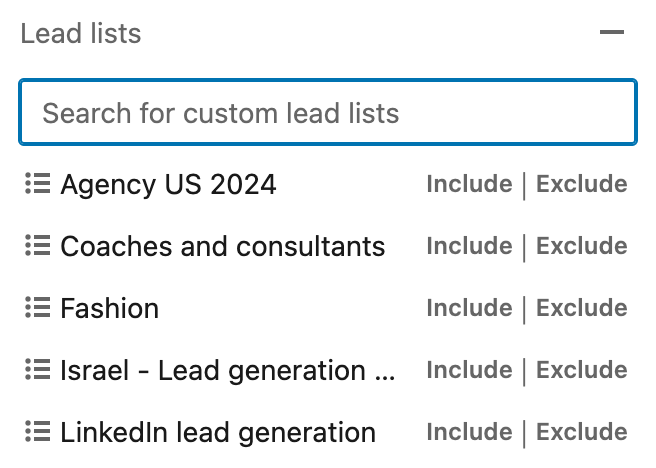
Step 9: Go back to home -> click on Lead filters
Step 10: Scroll down to Workflow -> Lead lists -> Select the Lead list you just saved
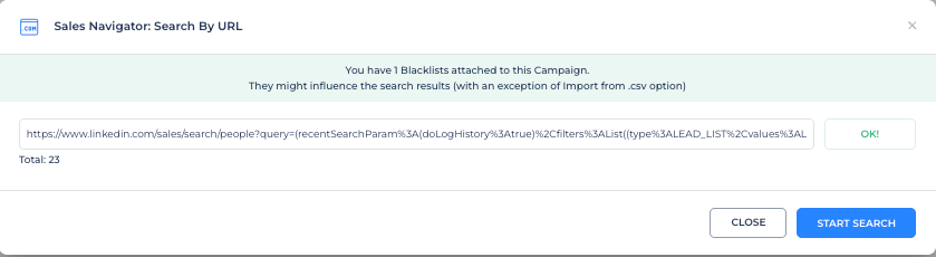
Step 11: Once you are happy with the list, copy the URL from Sales Navigator-> import to Salesflow campaign via “Sales Navigator: Search By URL” method
Let’s take a look at an example here to understand this better.
Use Case: Targeting Enterprise Accounts with Specific Criteria
Scenario:
You are a B2B SaaS vendor targeting enterprise financial institutions in North America that want to engage only with FinTech enterprises.
For this, a standard lead search often falls short.
This is where Sales Navigator’s Account-first approach shines, allowing you to identify companies that meet your ideal account profile before drilling down to the right people inside those companies.
Your goal:
When you want to do outbound with the ICP:
- Your ideal customer profile includes large to enterprise-sized organizations (e.g., 500+ employees, $100M+ revenue).
- You’re targeting specific industries, like FinTech, SaaS, Manufacturing, or Healthcare, where organizational structure and funding events matter.
- You need to focus on accounts with particular signals, such as:
- Headcount growth in the past 6-12 months
- Recent senior leadership changes: i.e, recently hired a new CIO or Head of Digital Transformation
- Companies that secured funding in the last year
- Your outreach is geographically focused on specific regions, such as North America, Western Europe, or APAC.
Filters Applied:
Rather than running a broad lead search, you would:
- Start with an Account-level search in Sales Navigator, applying filters for company size, industry, growth, funding, and location.
- Save the list of vetted accounts.
- Run a Lead-level search scoped only to your saved accounts, then filter for decision-makers (e.g., VP, C-level) in IT and Transformation roles.
- Manually vet the lead list to ensure relevance, save it, and import it into your outreach campaign tool.
This process ensures you’re engaging with the right people in the right companies, minimizing wasted outreach and improving response rates.
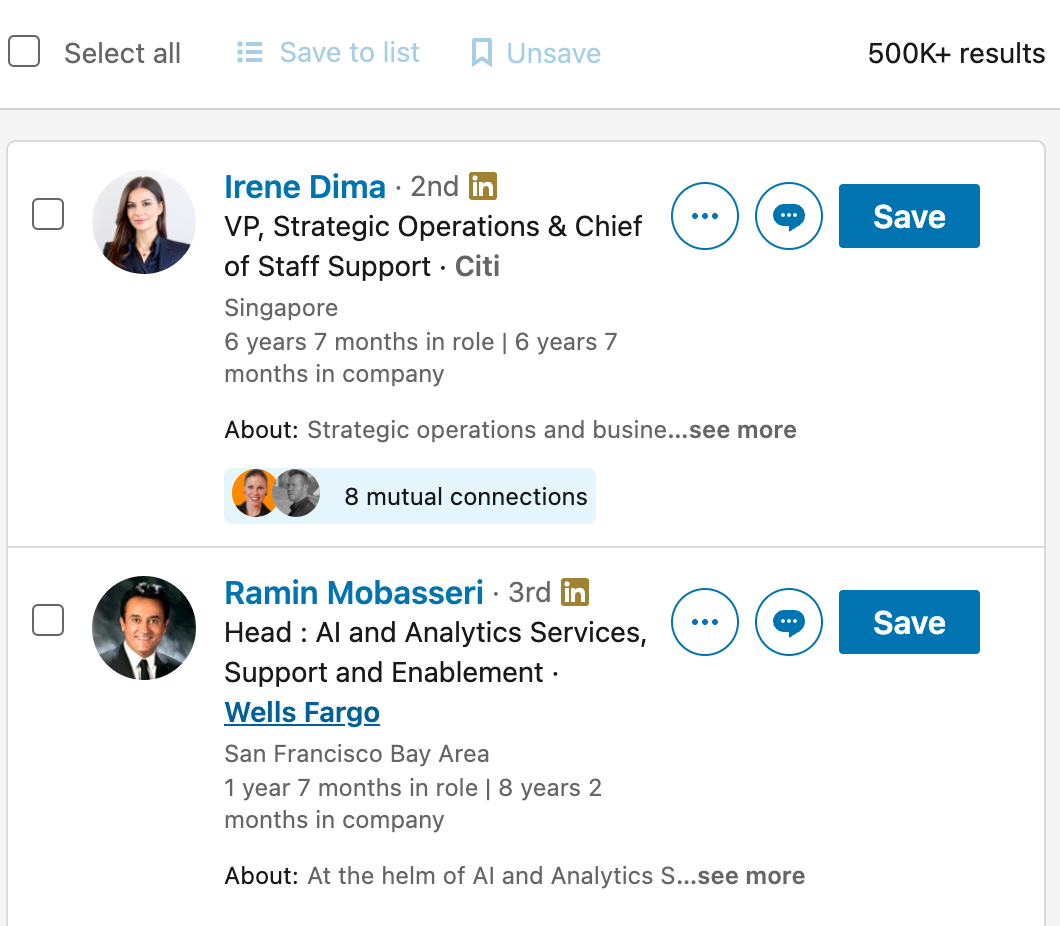
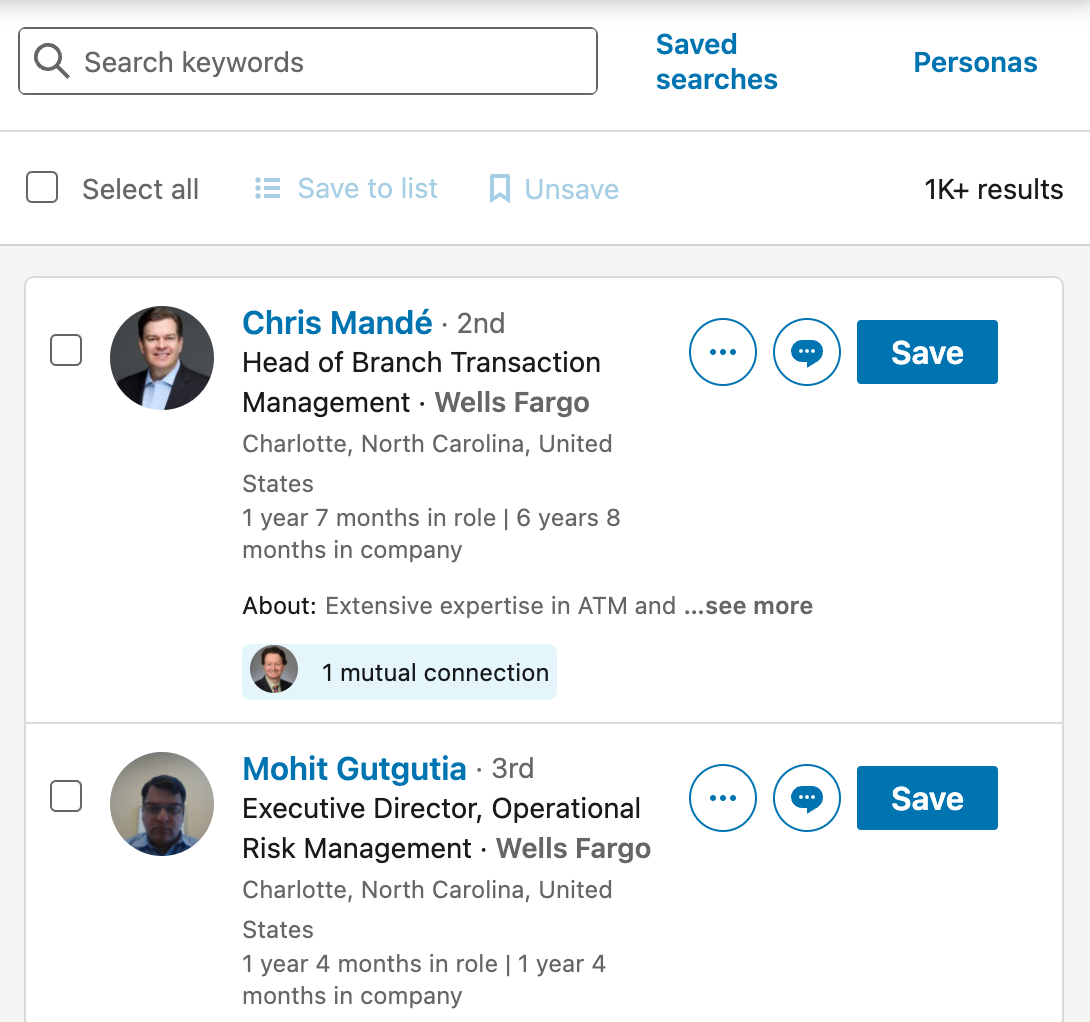
Result:
We applied the following lead filters to the Account list we saved earlier
- Connection: 2nd and 3rd
- Function: Finance
- Seniority level: Director
- Geography: United States
Once you follow the process and apply the right lead ICP, we end up with a list of 1K+ people from relevant, high-intent companies, which will keep a campaign going for about 2+ months!
Turning Leads into Results with Sales Navigator
Sales Navigator is far more than just a search tool; it’s a strategic engine for building high-quality, targeted lead lists that will enhance and improve your outreach campaigns.
Whether you start by focusing directly on individuals through Lead Filters, build Account-First lists for stronger company-level targeting, or take it to the next level by combining both methods and manually vetting each lead, the key takeaway is the same: precision beats volume.
By applying filters with purpose, leveraging company signals such as recent funding or hiring growth, and refining your lists at every step, you’ll create campaigns that resonate with real decision makers who are more likely to engage with you and your company.
Investing the extra time to structure your searches, vet your leads, and tailor your lists to your ideal customer profile not only saves effort down the line but also dramatically improves your conversion rates.
In the end, Sales Navigator’s real power lies in how strategically you use it, not just finding more leads, but finding the right ones.
Start exploring, experiment with different approaches and filters, and you’ll soon see that your LinkedIn outreach campaigns are performing better than ever.
Ready to turn those high-quality Sales Navigator lists into conversations?
Start your first outreach campaign with Salesflow, the fastest way to automate LinkedIn prospecting, boost reply rates, and close more deals.
FAQs:
.svg)

.png)
