If you’re reading this, we’re going to assume you already know the basics: Salesflow works, it’s easy to use, our analytics are solid, and yes, our ban rate is close to zero.
So we’ll skip the pitch and get straight to the point.
In the next couple hundred words, we’ll walk you through exactly how to create a campaign in Salesflow in five clear, actionable steps, from picking the right outreach type to writing your messages, setting schedules, and staying well within LinkedIn’s limits.
Let’s get to it.
Before You Begin: Quick Prep For Creating Multistep LinkedIn Campaigns
Before you dive into building your first campaign, there are a few one-time setup steps worth checking off. Doing them upfront makes the whole process smoother and ensures everything runs safely and within LinkedIn’s limits.
Here’s what to knock off your list:
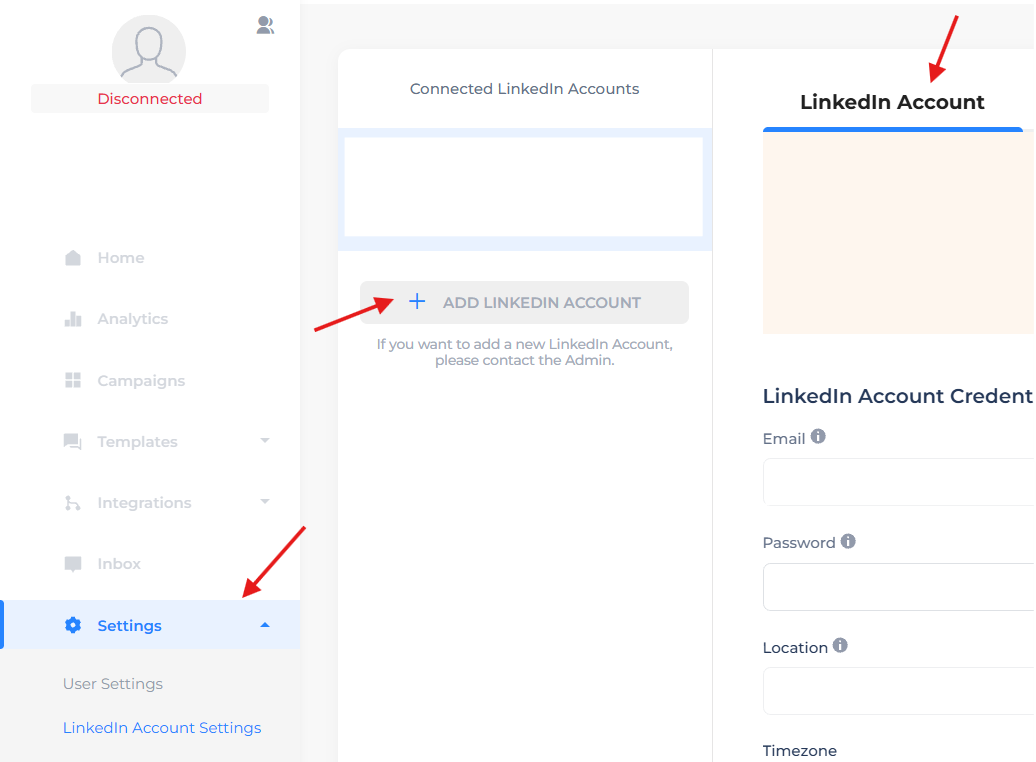
1. Connect Your LinkedIn Account
Salesflow works by automating actions on your behalf, so it needs to be connected to your LinkedIn profile. You’ll be prompted to link your account during onboarding, but if you haven’t already, head to Settings → LinkedIn Accounts and plug yours in.
Bonus tip: Use a dedicated LinkedIn tab for prospecting. Avoid mixing it with personal browsing or job hunting.
2. Warm Up Your Profile (If It’s New)
If your LinkedIn account is brand new or hasn’t been active, take a week or two to manually:
- Add connections
- Engage with a few posts
- Fill out your profile
This helps reduce the risk of getting flagged once automation kicks in. Salesflow plays it safe with guardrails built in, but LinkedIn still prefers to see “human” behavior.
3. Build & Save Your Lead Lists To Automate LinkedIn + Email
Use LinkedIn Sales Navigator or basic LinkedIn search to create a lead list based on your ICP (industry, role, region, etc.). Save your search and keep it organized. You’ll import it in Step 4.
With all that squared away, you’re ready to build.
Step 1: Pick Your Campaign Type & Set the Basics
First things first: head into Salesflow and hit “Campaigns” and then “New Connections”
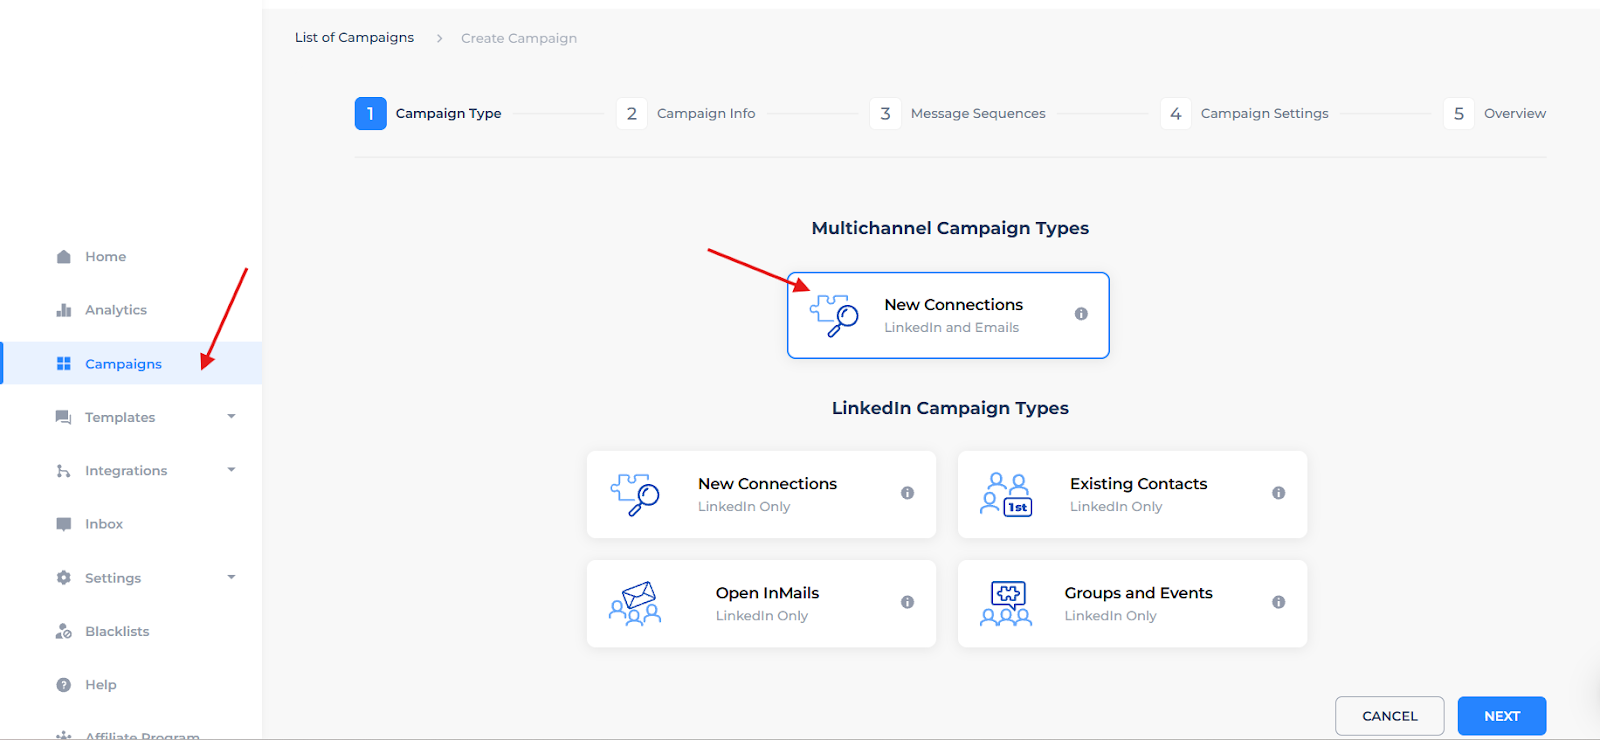
This is the go-to campaign type if you want to automate connection requests followed by a personalized message sequence, your classic LinkedIn outreach funnel.
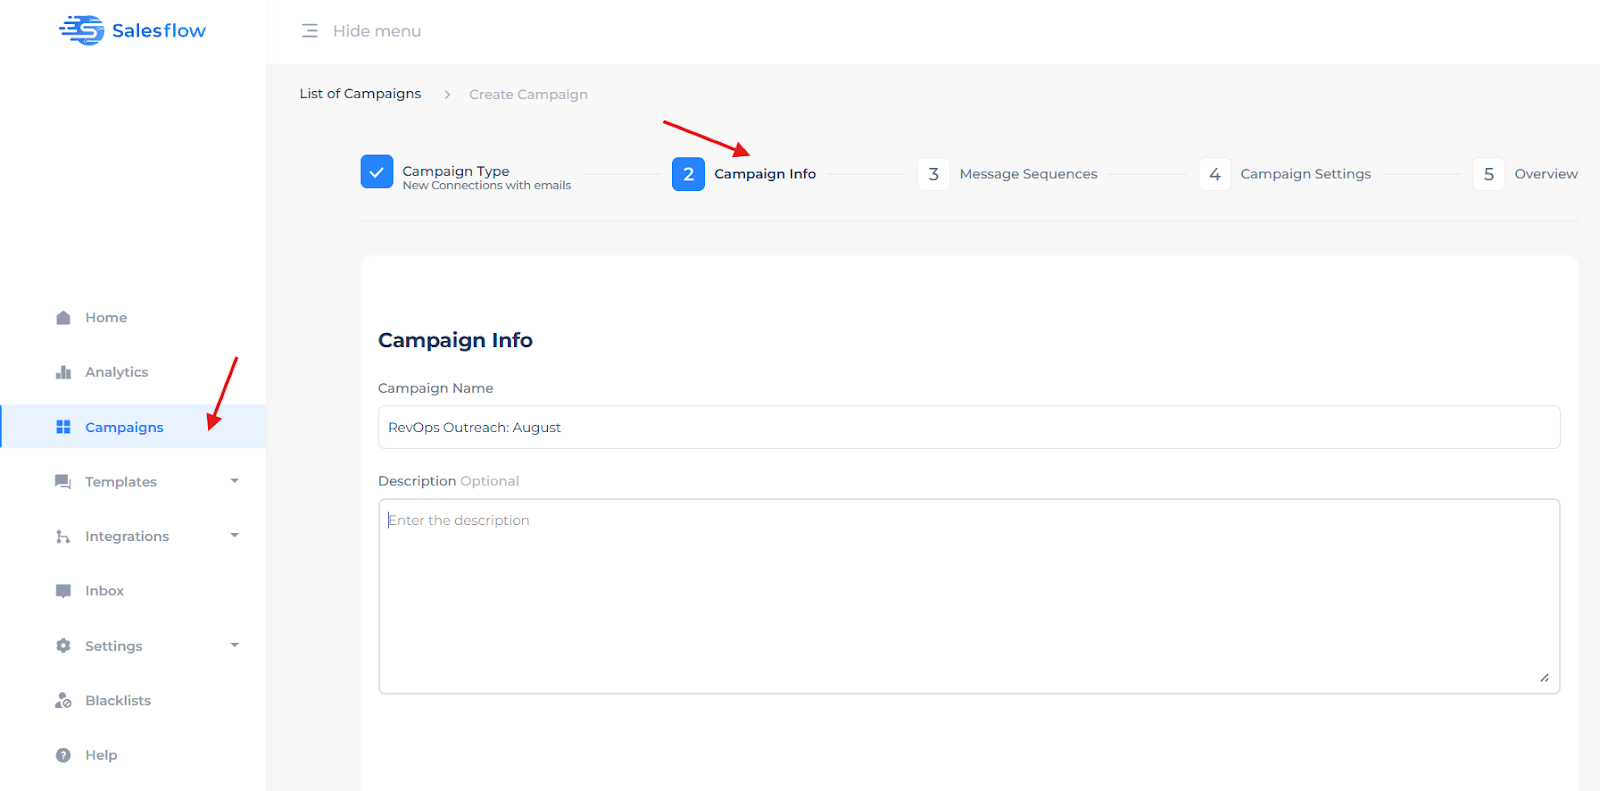
Start by naming your campaign.
Be specific. “Renewable Energy Prospects: July” is better than “Campaign 2.” It’ll make life easier when you’re juggling multiple flows.
Before you jump into messaging, Salesflow lets you add some light “warm-up actions” to help boost your acceptance rates. These are little social touches that make you look more human:
- Visit their profile
- Like a recent post
- Endorse a skill
These can be sprinkled in right after someone accepts your request, but before your first message lands in their inbox.
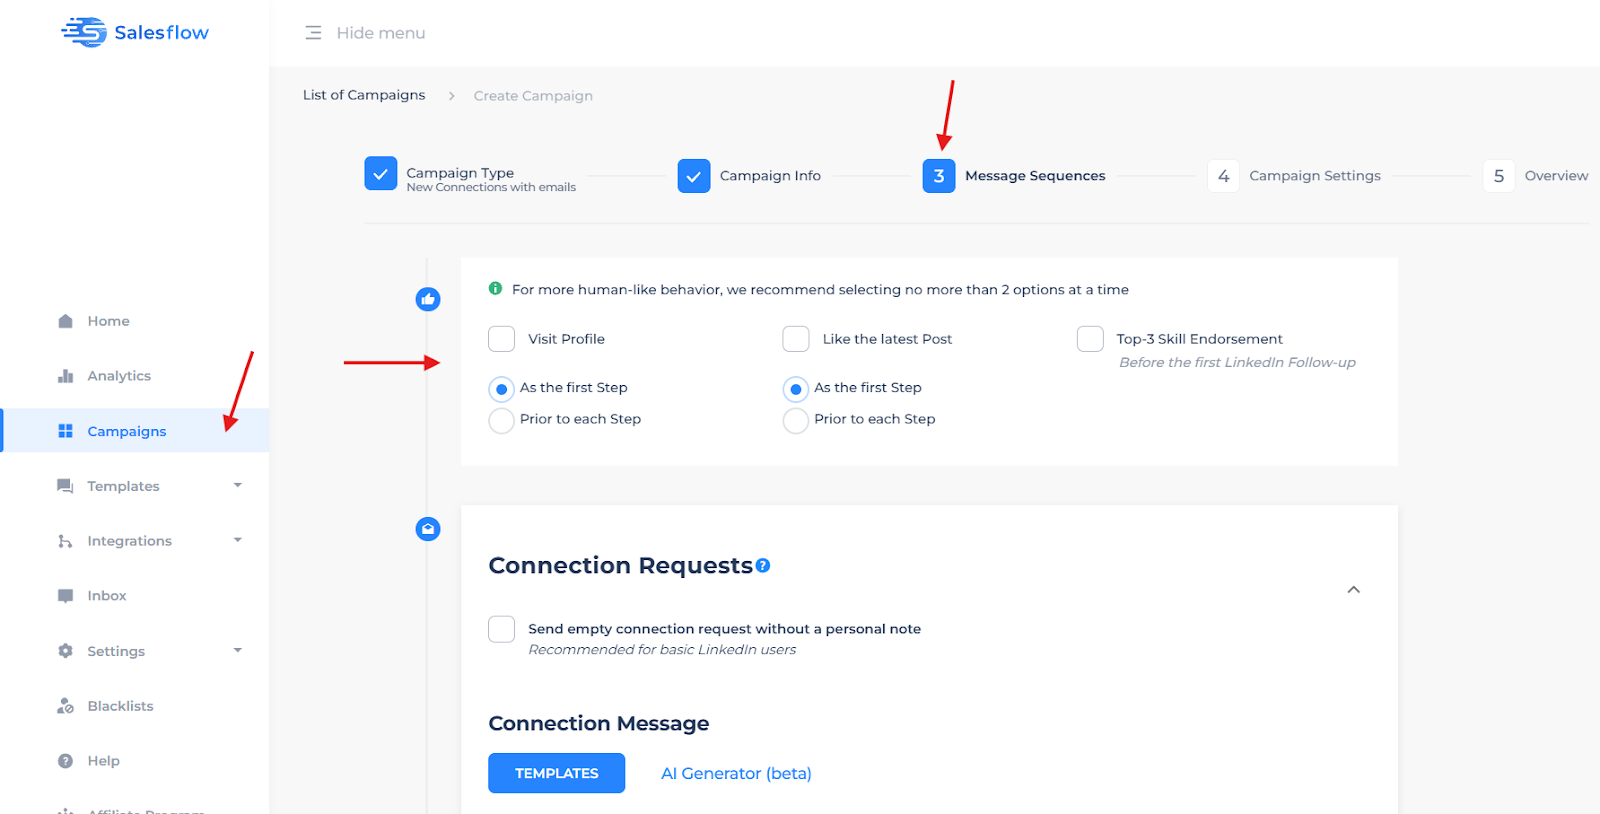
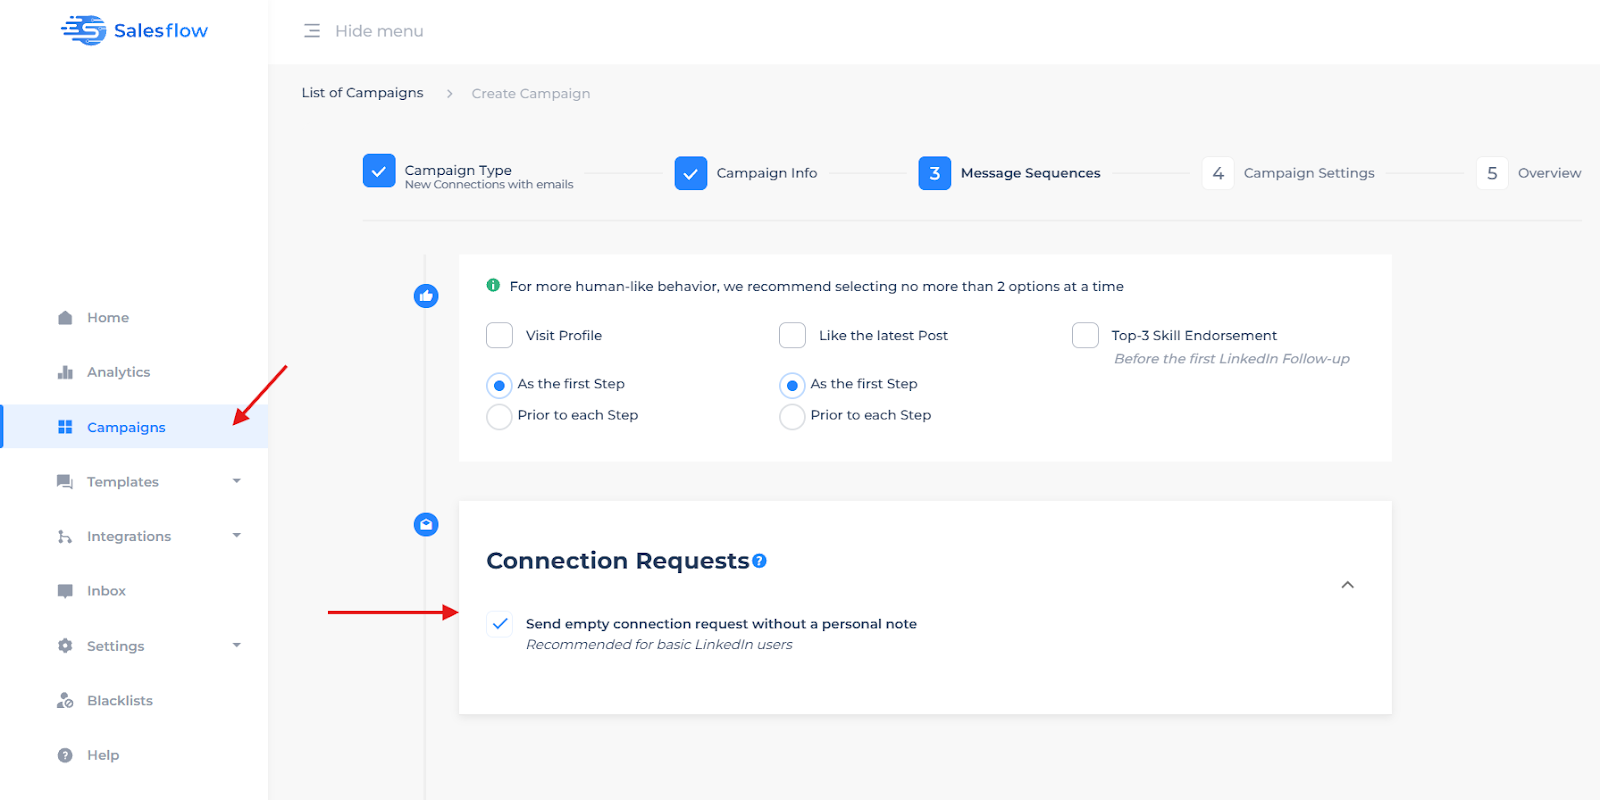
Next up: the connection request itself. You can send it with or without a message.
Some users prefer a quick, silent request (less friction), while others drop in a short note to build context. You’ve got options, and either way, you can use dynamic tokens (like first name, company, etc.) to personalize at scale.
Once that’s locked in, we can move to the next step, “Campaign Settings”.
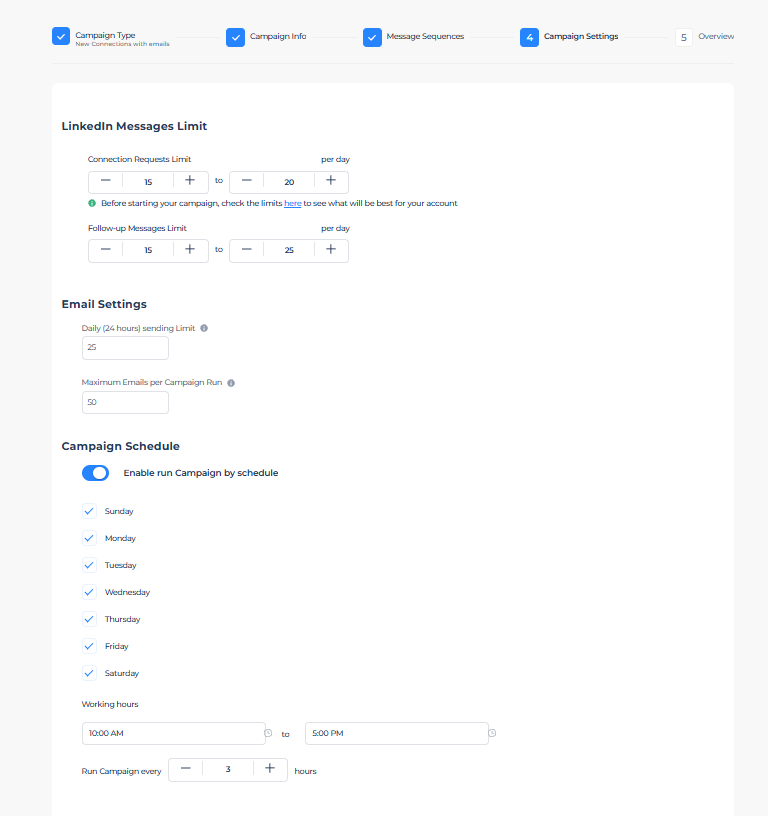
Step 2: Set Smart Sending Limits & Schedule
This is where good campaigns stay great, and don’t get flagged by LinkedIn.
Salesflow gives you full control over how often your campaign sends connection requests and messages.
And while the automation is powerful, you still want to play it cool. Staying within safe LinkedIn automation limits is non-negotiable if you want to keep your account in good standing.
Here’s how to set it up:
Set Your Daily Limits
LinkedIn officially caps connection requests at 100 per week, and while that’s flexible, you don’t want to push it.
Inside your campaign settings, you’ll set:
- Daily connection invites (recommendation: 15-20/day)
- Follow-up message sends per day
- Optional: throttle limits further if you’re running multiple campaigns
Choose Your Active Days & Hours
Salesflow lets you define when your campaign runs, down to the hour.
Best practices:
- Stick to business hours (e.g. 9 AM - 5 PM in your prospect’s time zone)
- Avoid weekends unless your audience is active
- To keep it looking human, stagger actions naturally
Your campaign will now send invites and messages on your schedule, in the background, while you focus on conversations and conversions.
Pro Tip: Start Slow, Then Scale
If this is your first campaign or your LinkedIn account hasn’t been very active, start with lower numbers (10-12 invites/day) and ramp up gradually.
Salesflow will handle the pacing, just make sure you’re not overloading the system on Day 1.
After this, remember to click on “Overview” and hit “Create” to save your campaign.

Step 3: Build Smart Outreach Sequences
Now that your campaign shell is set up, it’s time to craft the real heart of your outreach, i.e., the message sequence through templates.
Once someone accepts your connection request, they’ll automatically be dropped into a follow-up flow, a timed series of messages you can set up to nudge the conversation forward.
Here’s how to build it inside Salesflow:
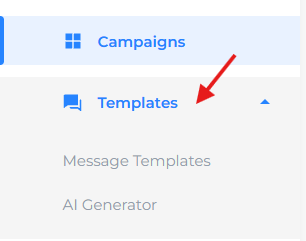
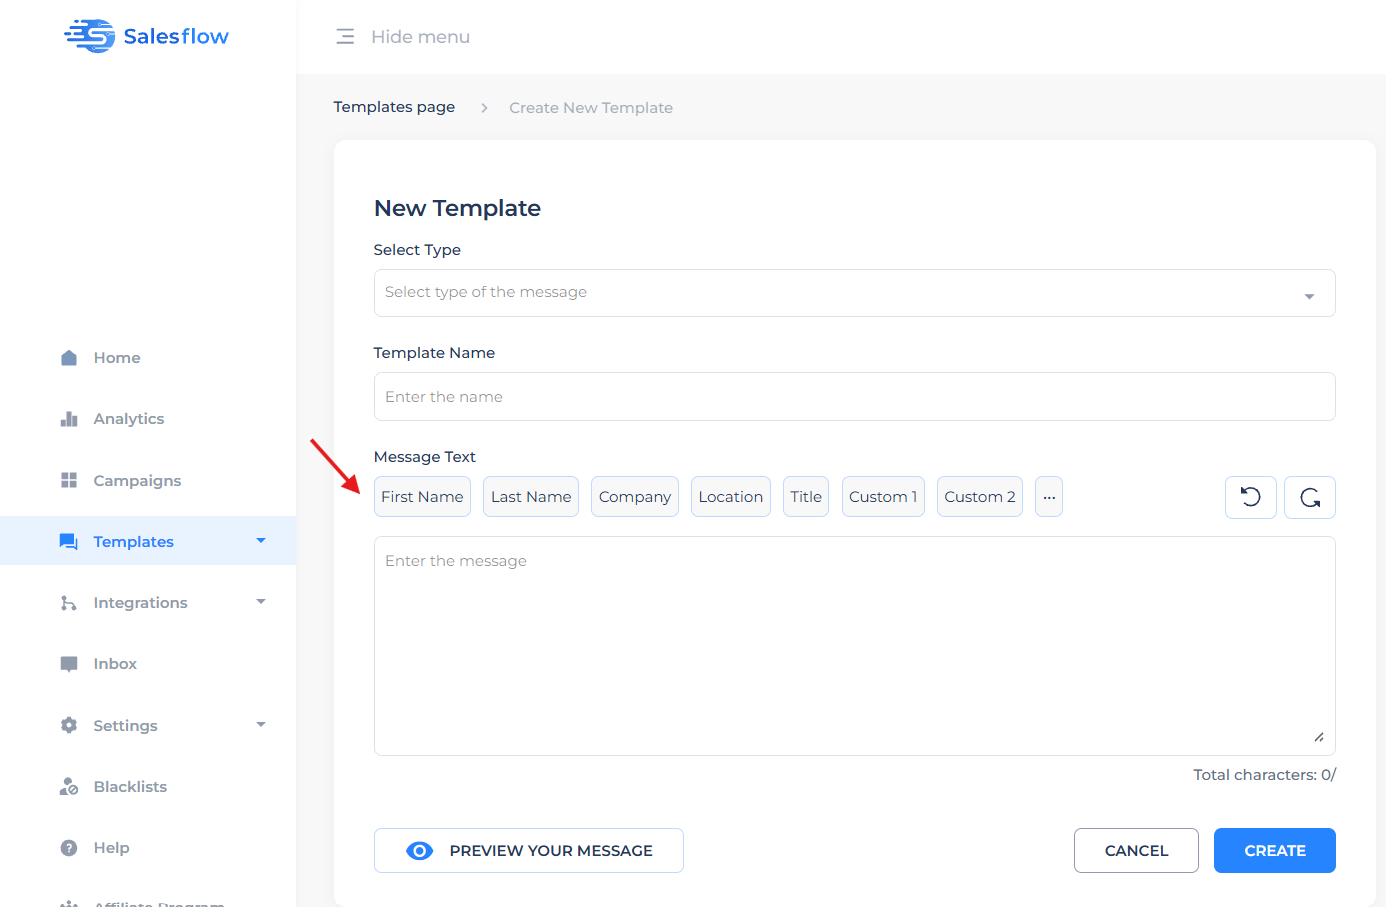
Save Time with Sales Outreach Through Message Templates
Head to the Templates tab and create a few go-to messages. You can also do this directly inside the campaign builder in Step 1 here:
Templates are saved snippets you can reuse across campaigns, great for scaling outreach without sounding robotic.
You can either choose to create a message template from scratch, or use our AI generator.
Use short, conversational copy that feels compelling and valuable. Personalize using dynamic tokens like:
- {firstName}
- {company}
- {jobTitle}
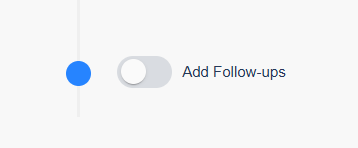
Sequence It Out
Once your templates are ready, go back to your campaign builder and start layering them in.
Here’s a simple, proven Salesflow message sequence:
You can set delays between messages in days after connection, and Salesflow will handle the delivery schedule behind the scenes.
Once you’ve got your messages in place, you’re 100% ready to schedule and launch. That’s coming up next.
Step 4: Sales Navigator Scraping Automation
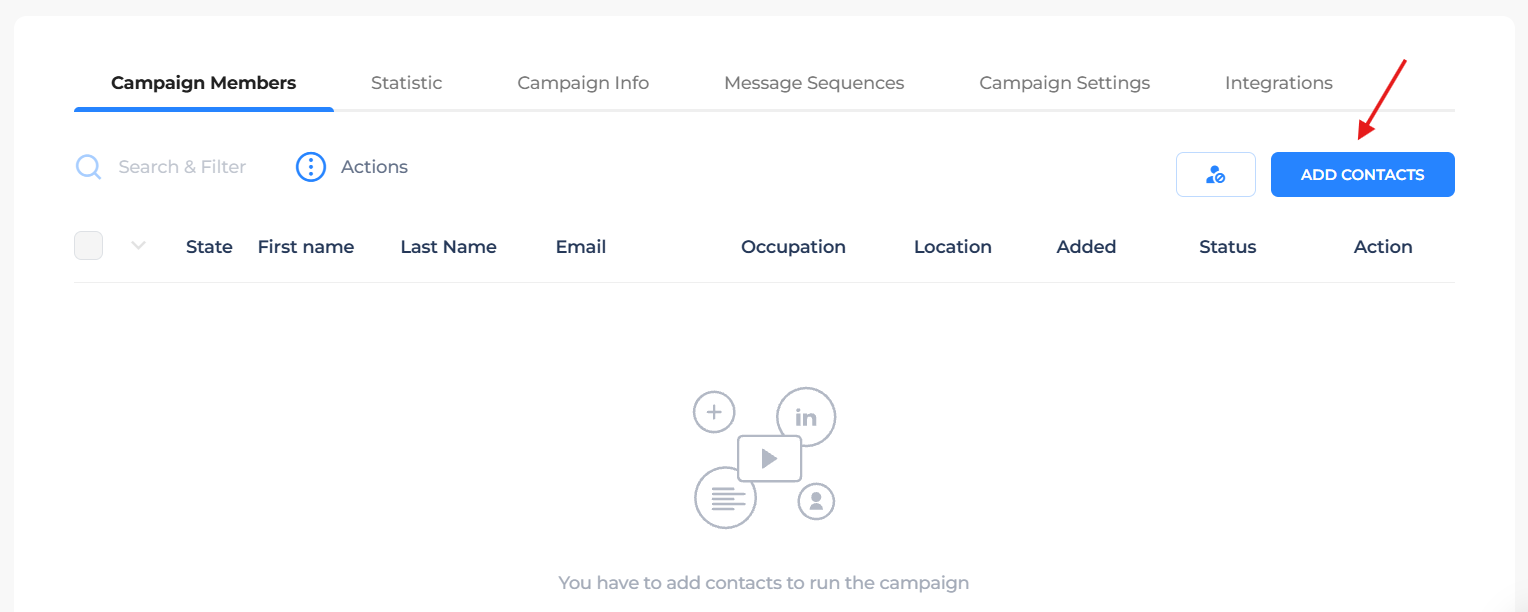
Now that your campaign is primed and scheduled, it’s time to bring in the people.
Salesflow makes it easy to import leads directly from LinkedIn Sales Navigator (or regular LinkedIn search). If you did your homework in the prep stage and already saved your search, this part takes all of 60 seconds.
Here’s how it works:
Step 1: Use a Saved Search
In Sales Navigator, build and save a search with your target audience, filter by:
- Job title
- Industry
- Location
- Company size
- Seniority level
Step 2: Import via Salesflow
Inside your campaign, click “Add Contacts”:
Then choose “Import Saved Searches.”
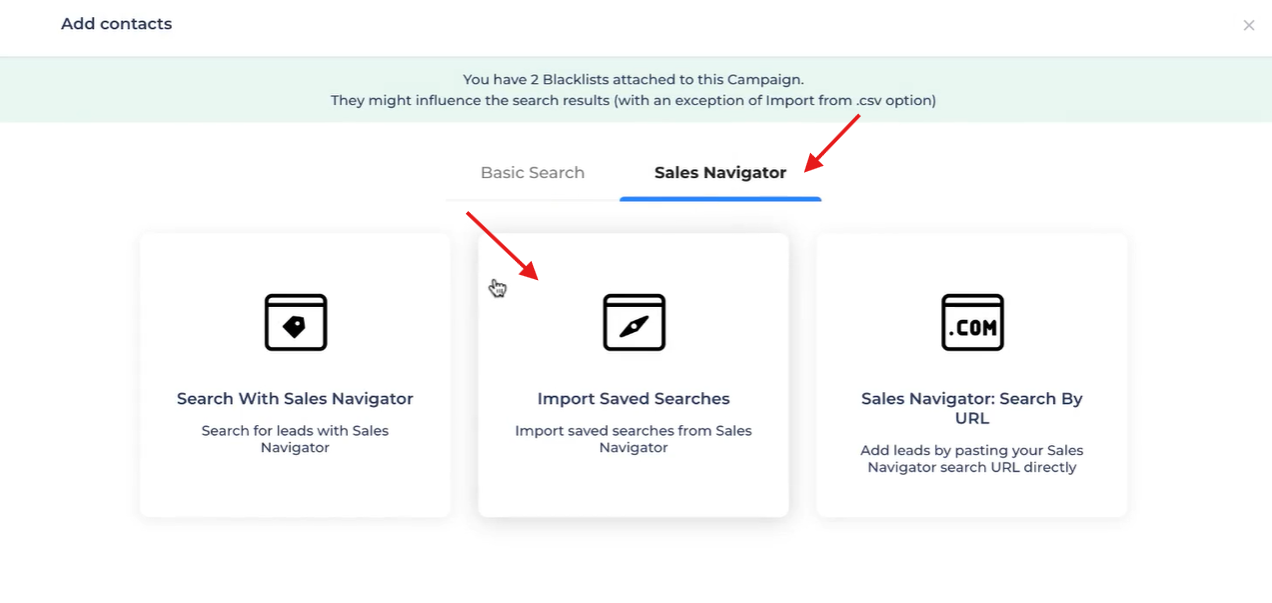
Salesflow will pull in your most recent Navigator searches. Pick the one you want and click on “Start Import”
Salesflow handles the upload in the background, usually bringing in 25-50 contacts at a time, depending on the search size.
Note: Not using Sales Navigator? You can still upload contacts manually or use basic LinkedIn search, but you’ll lose out on advanced targeting. For well-performing outreach, Navigator is the better option.
Step 3: Confirm & Launch
Once the import kicks off, you’ll see your leads populate inside the campaign funnel.
If everything looks good, hit Play, and your campaign is live!
Step 5: Monitor, Optimize, Repeat to Scale LinkedIn Outreach
Congrats, your campaign is live, leads are flowing in, and messages are going out on autopilot. But you’re not done yet.
You now need to start tracking what’s working (and what isn’t) using built-in Salesflow analytics.
Here’s how to make that happen:
Check Your Campaign Dashboard
Head to the “Analytics” tab to see:
- Invites sent
- Connections accepted
- Replies received
- Step-by-step message performance
You’ll get a clear funnel view showing how far prospects are making it through your sequence, and where they’re dropping off.
Here’s what the analytics tab looks like in action:
Pro Tip: If Message 2 is tanking your replies, tweak it. If your connection rate is low, revisit your invite note or lead targeting.
A/B Test & Tweak
Salesflow makes it easy to swap out templates, change message timing, or adjust your cadence. This is where campaign optimization happens.
Try things like:
- Testing short vs. long intros
- Changing CTAs (calendar link vs. soft ask)
- Varying time delays between messages
Even small shifts can move your reply rate up fast.
Refresh Your Lead List
Over time, even the best campaign list runs dry. Make it a habit to:
- Update your Sales Navigator search weekly
- Import fresh leads into the same campaign or duplicate it
- Remove unresponsive leads after a few weeks
What Happens After Launch (And What You Should Do Next)
Remember: as soon as someone replies, Salesflow pauses the sequence, and it’s your turn to take over.
So don’t let warm leads sit. Jump in fast, and keep the conversation going.
That’s it, your Salesflow campaign is fully live, running safely, and tuned to perform.
Want to go deeper? Test multi-channel follow-ups, connect campaigns to your CRM, or explore Salesflow’s advanced features like team inboxes and reply tagging.
But for now? You’ve got a campaign that works!
If you want a video tutorial of this to follow along, watch this:
And for more tutorials on Salesflow features and how-tos, head over to our knowledge hub.
Salesflow is built to help you scale your campaigns, so whether you're booking sales calls, growing your pipeline, or just staying top-of-mind, you're set up to do it better, faster, and smarter.
So, go log in to Salesflow and launch your first campaign now!
Or, if you’re new here, start your free trial and see how easy outreach can get.
FAQs:
.svg)
%20on%20LinkedIn%20%2B%20email_%20practical%20setup.png)
.png)
.png)