.png)
Prefer listening?
Hear the audio version of this article here:
Sales reps lose valuable time when outreach activity and CRM records live in separate places. Connections happen on LinkedIn, conversations continue through messages and email, and the CRM gets updated later, sometimes only when someone remembers. Salesforce reports that reps spend 70% of their time on nonselling work, which makes unnecessary manual CRM upkeep even harder to justify.
Centralized sales data gives your team one place to see prospect details, engagement, replies, messages, and follow up activity.
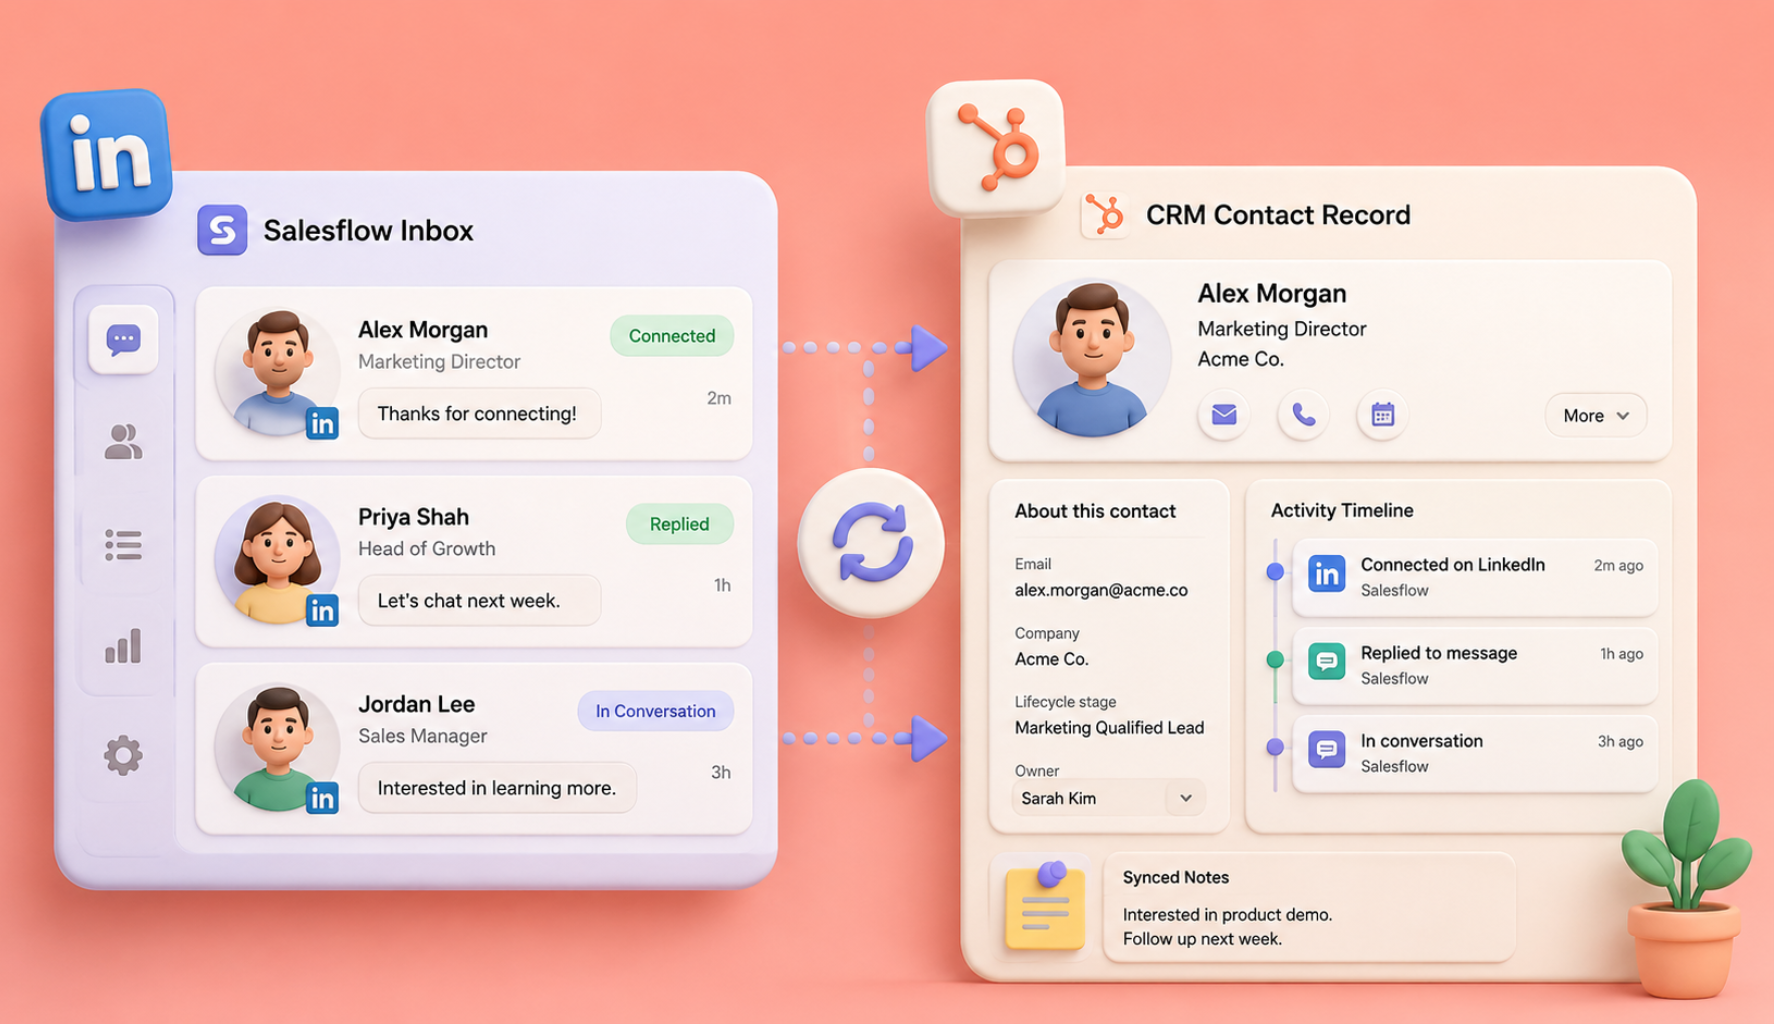
Salesflow's native HubSpot connection can push outreach events into the CRM and pull eligible HubSpot contacts into Salesflow campaigns. If you are comparing a linkedin automation tool with crm integration, start by looking at the data flow: what moves into the CRM, what moves back into outreach, and which events trigger each update.
Problems Caused by Disconnected Outreach and CRMs
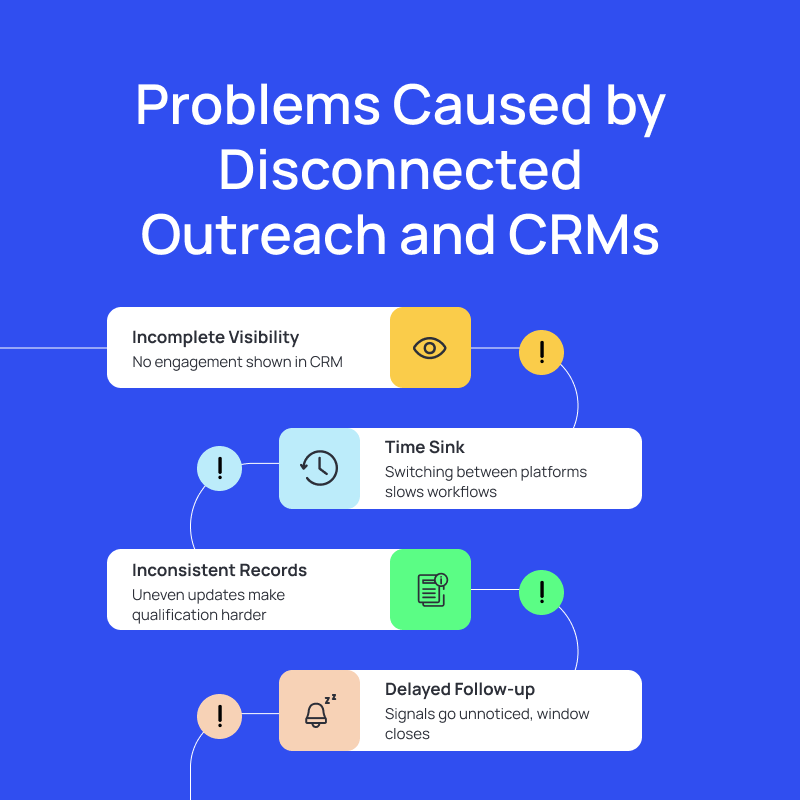
When outreach activity and CRM data live in separate systems, the pipeline stops reflecting what’s happening. A few issues appear quickly:
Incomplete visibility
A prospect may connect on LinkedIn, reply to a message, open an email, or continue a conversation while the CRM still shows little or no engagement.
That leaves reps working with incomplete information. Managers may also review pipeline activity without seeing the conversations behind each record.
Time sink
Conversations happen in outreach platforms, but many sales decisions happen inside the CRM.
Without a connection between the two, reps have to move between systems to understand what happened with a prospect. This slows down follow-ups and makes handoffs harder.
Inconsistent CRM records
Manual updates are rarely consistent across an entire sales team.
One rep may record every interaction. Another may only update a record after receiving a reply. As outreach volume increases, those differences make qualification and reporting less reliable.
Delayed follow-up
A connection or reply can be an important signal that a prospect is ready for the next conversation.
When that activity stays inside the outreach platform, the rep may not see it when it matters most.
A connected workflow reduces these gaps by keeping important prospect activity attached to the CRM record.
Why centralized sales data matters for your pipeline
A sales pipeline is useful only when the data behind it reflects what prospects are actually doing.
Every day, prospects connect, reply, receive follow-ups, open emails, and move through outreach campaigns. Each activity provides context about where that prospect stands.
If those events never reach the CRM, reps have to rebuild the story themselves.
A prospect could appear inactive in the CRM even though they replied on LinkedIn a few days earlier. Another contact may look engaged, but the record may be missing the message history that explains the opportunity.
Centralized sales data helps the CRM reflect those interactions as they happen.
When activity moves into the CRM automatically:
- Reps can see prospect engagement without checking several tools.
- Teams have more context when handing a lead to another person.
- Managers can review pipeline activity using more complete records.
- Important connections and replies are less likely to be missed.
- Conversation history stays attached to the contact.
Salesflow can also sync historical messages during the first HubSpot push and continue adding new inbox messages when message tracking is enabled.
That means the CRM can hold both prospect information and the conversation history behind it.
How Salesflow Centralizes Outreach and Messaging Data
Salesflow's native CRM connection is HubSpot and supports data movement in both directions. You can review the wider Salesflow features to see how CRM connectivity sits alongside LinkedIn and email automation.
Teams using Salesforce, Pipedrive, or another CRM can send selected Salesflow activity through webhooks, API connections, or automation tools instead.
For HubSpot users, Salesflow keeps outreach and CRM records connected through three main workflows.
Push: Salesflow → HubSpot
Push sends selected contact information and outreach activity from Salesflow into HubSpot when a configured event takes place.
Instead of asking reps to log activity manually, the integration can update the CRM when something meaningful happens during a campaign.
What Are Primary Triggers?
Primary triggers are outreach events inside Salesflow that cause a push to happen. These events represent meaningful activity in your campaign, and they determine when a contact is sent or updated in the CRM.
A contact can be created or updated in HubSpot as long as they have either an email address or a LinkedIn URL.
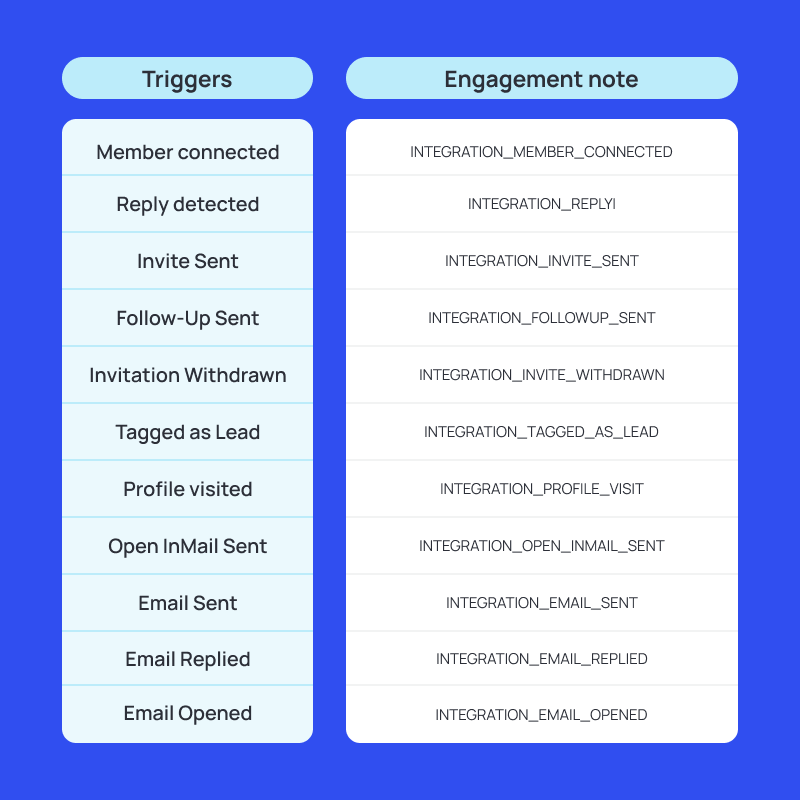
Primary triggers include:
- Member connected
- Member replied
- Invite sent
- Follow up sent
- Invitation withdrawn
- Tagged as lead
- Profile visited
- Open InMail sent
- Email sent
- Email replied
- Email opened
Every primary trigger produces a corresponding labeled CRM note, such as:
Primary triggers control both the first push and all subsequent pushes for that contact. Every time one of these events occurs, Salesflow syncs relevant data to the CRM.
First Push Logic
The first push occurs the first time any primary trigger fires for a contact. This push is the most comprehensive because it establishes the initial CRM record.
During the first push, Salesflow sends:
- Contact fields:
- First Name
- Last Name
- LinkedIn URL
- Company Name
- Location
- Phone Number
- Email
- Imported Email is sent if present
- If not, the standard Email field is sent
- Occupation
- A “Pushed to CRM” label with a timestamp.
- An engagement note labeled according to the trigger (e.g., INTEGRATION_REPLY).
- Historical messages include every message exchanged from the campaign’s creation up to the moment the trigger fires, each added as an individual CRM note containing:
- Timestamp
- Sender
- Message text
- If a list has been selected as part of the integration setup, the contact is also added to that list during the first push.
Subsequent (2nd+) Push Logic
Every primary trigger that fires after the first push results in a subsequent push (not to be confused with secondary triggers). These pushes are lighter because the CRM record already exists.
Subsequent pushes:
- Add new engagement notes for the latest event
- Update only empty CRM fields (never overwriting existing data)
- Do not resend historical messages
- Maintain clean, incremental updates to the CRM
This ensures your CRM evolves with each interaction without disrupting previously stored information.
Note:
- Push can send contacts either to a Static List or to All Contacts (no list).
- If an email exists, Salesflow follows the established priority rule: Imported Email is used first; if no Imported Email is available, the standard Email field is sent.
- Push logic applies only to Salesflow → CRM syncs; Pull operates differently and does not use triggers.
What Are Secondary Triggers?
The secondary trigger handles one job: syncing new inbox messages after a contact has already been pushed to the CRM.
It does not create push events, and it does not affect first or subsequent pushes.
Once enabled (and only after the first push has occurred), Salesflow monitors the conversation thread and sends every new message, manual or automated, to the CRM as an individual note.
Each synced message includes:
- Timestamp
- Sender
- Message text
This gives your CRM a complete, ongoing message timeline without manual copying or logging.
Note:
Secondary triggers:
- Do not send contact fields
- Do not resend historical messages
- Only work for contacts who have already been pushed
- Remain disabled until at least one primary trigger is selected
Push example: how one prospect's CRM record develops
Imagine you are running a LinkedIn outreach campaign and a prospect named Maya enters your sequence.
1. You send Maya a connection request
If "Invite Sent" is one of your configured primary triggers, Salesflow can push the activity at this stage.
If it is not selected, the system waits for another configured event.
2. Maya accepts your connection
Suppose "Member Connected" is selected as a trigger.
Salesflow can now create or update Maya's HubSpot record with available contact information, the connection activity, and the eligible message history associated with the initial push.
The CRM now has context around why Maya appeared in the pipeline.
3. Maya replies
If a reply is one of your selected triggers, Salesflow can send the new engagement activity to HubSpot.
The rep reviewing Maya's record can see that the relationship has moved beyond the initial connection.
4. Message tracking continues the history
If message tracking is enabled, later eligible messages can continue flowing into the CRM after the initial push.
The CRM record becomes a running view of the relationship rather than a static contact entry.
Pull: HubSpot → Salesflow
Pull works in the opposite direction.
Instead of sending outreach activity into HubSpot, it brings eligible HubSpot contacts into Salesflow so they can enter a LinkedIn outreach campaign.
Salesflow can monitor a selected HubSpot list for newly added contacts. HubSpot documents the difference between active and static HubSpot segments, which can help you choose the right list structure before connecting it to outreach.
When an eligible contact appears, Salesflow checks the information required for the campaign and can create the prospect inside the assigned Salesflow campaign.
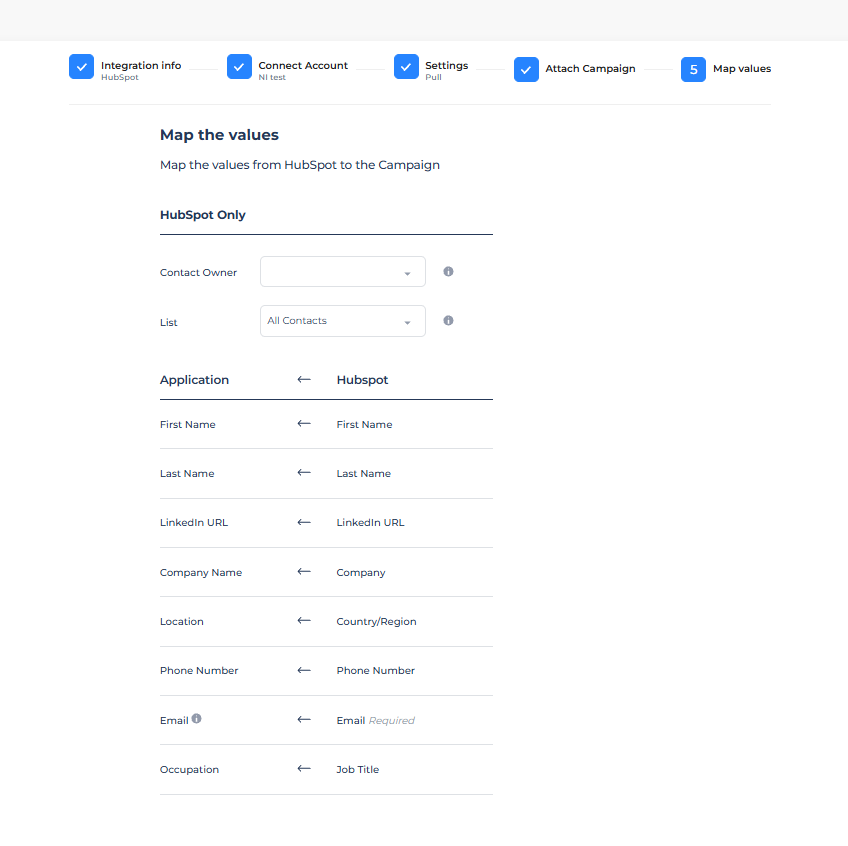
Common mapped fields can include:
- First name
- Last name
- LinkedIn URL
- Company
- Location
- Phone number
- Occupation or job title
The LinkedIn URL is particularly important because Salesflow needs to identify the correct LinkedIn prospect for outreach.
Pull does not update the HubSpot record. Its job is to bring eligible CRM contacts into the selected Salesflow campaign.
Pull example: moving a HubSpot lead into outreach
Suppose a new prospect named Daniel fills out a form and enters one of your HubSpot lists.
1. Daniel enters the selected HubSpot list
The contact may have come from a form, webinar, import, or another lead generation source.
Salesflow monitors the HubSpot list connected to the Pull integration.
2. Salesflow checks Daniel's details
Salesflow checks whether the information required for the workflow is available.
If Daniel has a valid LinkedIn URL, he can move into the connected Salesflow campaign.
3. Salesflow creates the campaign member
Daniel's mapped information is added to the assigned campaign.
The sales team does not have to export a spreadsheet from HubSpot and import it into the outreach platform.
4. Daniel enters the outreach workflow
Once he is part of the campaign, the configured outreach sequence can begin.
Future eligible contacts added to the same HubSpot list can follow the same process.
5. If more leads get added to the HubSpot list, they all flow in
Anyone added to that same HubSpot list enters Salesflow the same way Daniel did, automatically, instantly, and without duplicate contacts across campaigns.
Salesflow on your mind? Sign up for our 7-day free trial here.
How to connect Salesflow to HubSpot
Salesflow's native HubSpot integration supports Push and Pull workflows. For a related CRM workflow example, see Salesflow's guide to HubSpot and LinkedIn outreach.
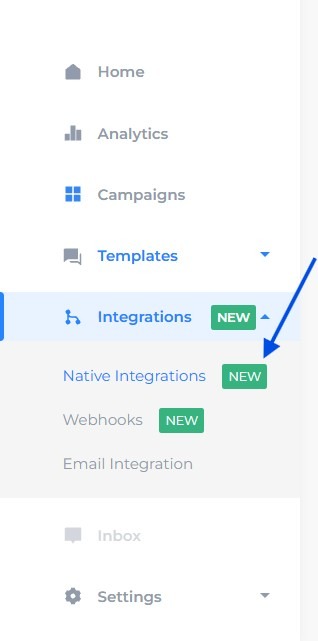
1. Open Native Integrations
From the Salesflow dashboard, open Integrations and select the native integration option.
Choose Add New Integration, give the connection a clear name, and continue to the next step.
2. Connect your HubSpot account
Authorize the HubSpot account you want to use.
Your LinkedIn account should already be connected to Salesflow before you create the HubSpot integration.
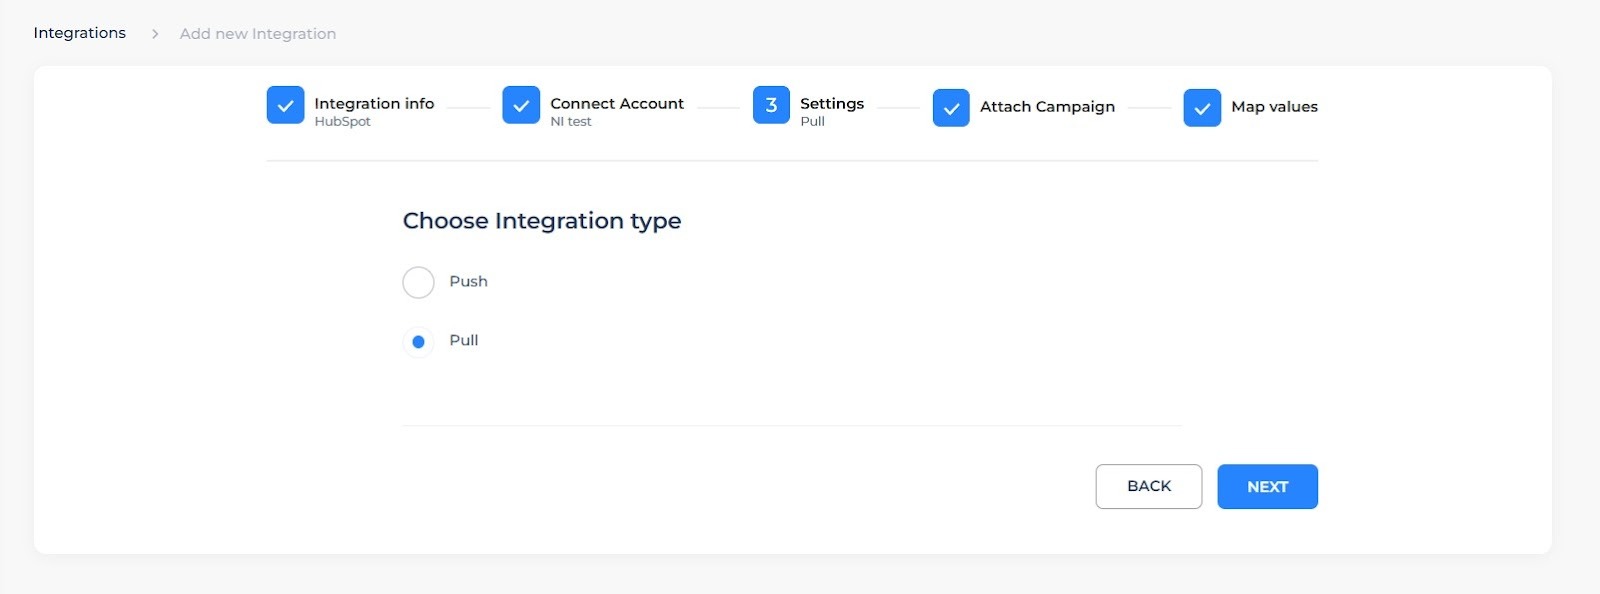
3. Choose the integration type: Push or Pull
Choose the direction that matches your workflow.
For Push, select the outreach triggers you want HubSpot to receive. You can also enable message tracking when you want later messages added to previously pushed records.
For Pull, choose the HubSpot list and the Salesflow campaign that should receive eligible contacts.
Then map the relevant fields between the two systems.
4. Save the integration
Once the setup is saved, Salesflow can begin listening for the configured Push events or watching the selected HubSpot list for new Pull contacts.
The workflow continues without asking reps to perform the same CRM update after every prospect interaction.

Practices that keep centralized sales data clean
Connecting two systems solves only part of the problem. The data still needs a clear structure.
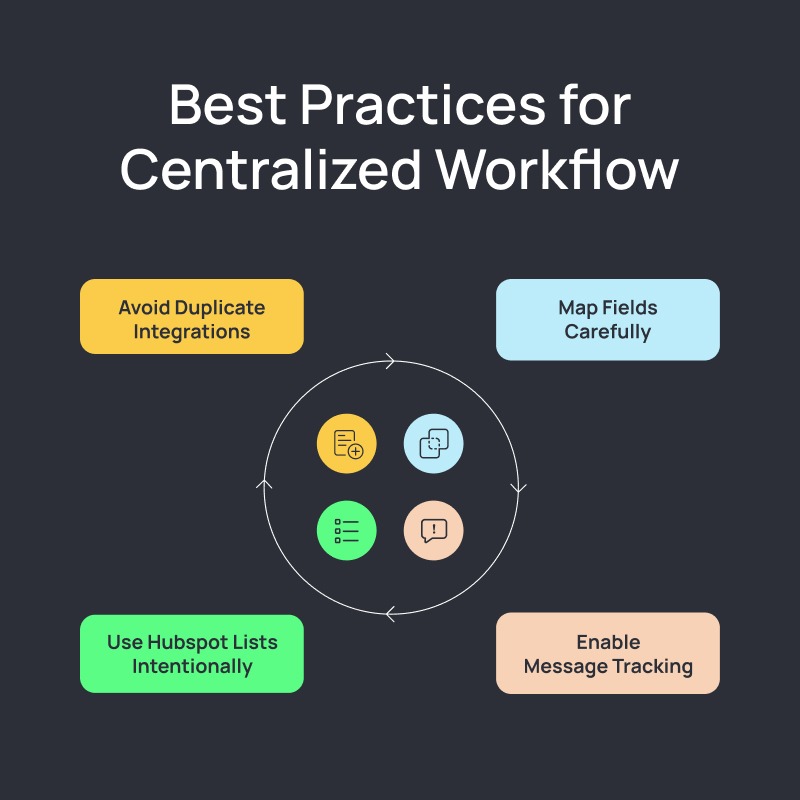
Avoid duplicate integrations
Avoid creating multiple Push integrations that send the same activity into the same HubSpot account unless there is a specific workflow reason.
Duplicate connections can create repeated activity and make the CRM harder to read.
Map important fields carefully
Check your LinkedIn URL, email, name, company, and other important fields before activating the workflow.
Clean field mapping makes it easier for Salesflow and HubSpot to identify the correct contact.
Enable message tracking when conversation history matters
If reps need later messages visible inside the CRM, enable message tracking for eligible contacts.
Without it, the CRM may contain the initial activity without the later conversation.
Choose HubSpot lists intentionally
For Pull workflows, use lists that match the audience you actually want to enter outreach.
The list becomes the bridge between CRM qualification and the Salesflow campaign.
Keep outreach and CRM data in one system
When outreach and HubSpot stay connected, reps can see the conversation history that explains each record instead of rebuilding context from separate tools.
Use Push triggers for activity that should reach HubSpot. Use Pull lists for contacts that should enter outreach. Enable message tracking when the CRM needs to capture later conversations as well.
The goal is simple: keep prospect activity close to the pipeline so your team can spend less time maintaining records and more time working with the right prospects.
If you want to see how the workflow fits your sales process, try Salesflow free or review Salesflow pricing before booking a demo with the Salesflow team.
.svg)


.png)